
Press Ctrl+ and K to search
目录
在Python开发过程中,你是否遇到过这样的困惑:为什么有时候函数返回None?什么时候应该使用None作为默认值?None到底是什么?作为Python开发者,理解None的本质和正确使用方式是提升代码质量的关键一步。
本文将深入解析Python中最特殊的数据类型——None,从单例模式的设计原理到实际开发中的最佳实践,帮你彻底掌握None的使用技巧,让你的Python代码更加专业和高效。
🔍 什么是None?揭开Python单例的神秘面纱
None的本质特征
None是Python中的一个特殊常量,代表"无"或"空值"的概念。它有以下几个重要特征:
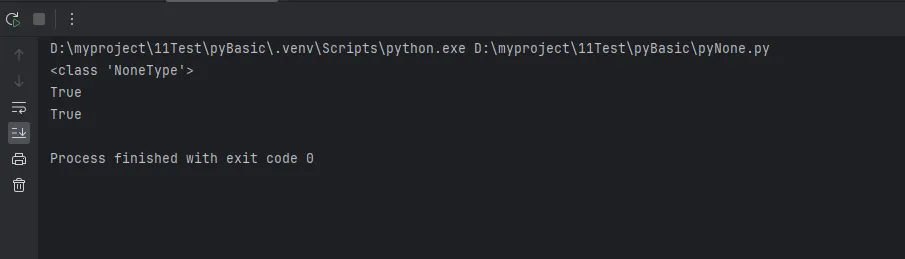
Python# None的类型
print(type(None))  # <class 'NoneType'>

# None是单例对象
a = None
b = None
print(a is b)  # True
print(id(a) == id(b))  # True,内存地址相同
关键特性:
- None是NoneType类的唯一实例
- 在整个Python程序中,所有的None都指向同一个对象
- None是不可变的(immutable)
- None在布尔上下文中被视为False
🎯 单例模式的优势
Python将None设计为单例模式有以下优势:
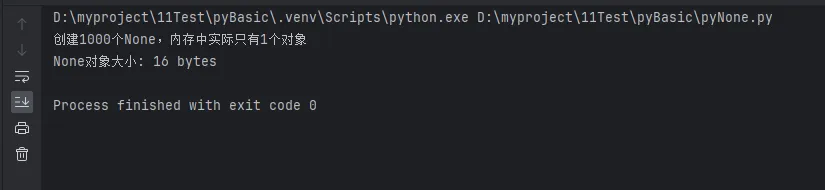
Pythonimport sys

# 验证None的单例特性
none_list = [None for _ in range(1000)]
print(f"创建1000个None,内存中实际只有{len(set(id(n) for n in none_list))}个对象")

# 内存效率对比
print(f"None对象大小: {sys.getsizeof(None)} bytes")
💡 None作为缺省值的语义分析
🚀 函数参数的默认值设计
在函数定义中,None常被用作可选参数的默认值,这是一种重要的编程模式:
Pythondef process_data(data, config=None, logger=None):
    """
    数据处理函数示例
    Args:
        data: 必需的数据参数
        config: 可选的配置参数
        logger: 可选的日志记录器
    """
    # 处理config参数
    if config is None:
        config = {"default": True, "timeout": 30}

    # 处理logger参数
    if logger is None:
        import logging
        logger = logging.getLogger(__name__)

    logger.info(f"开始处理数据,配置: {config}")
    # 实际的数据处理逻辑
    return f"处理完成: {len(data)} 条记录"


# 使用示例
result1 = process_data([1, 2, 3])  # 使用默认配置
result2 = process_data([1, 2, 3], {"custom": True})  # 自定义配置

print(result1)
print(result2)
⚠️ 避免可变对象作为默认值的陷阱
错误示例:
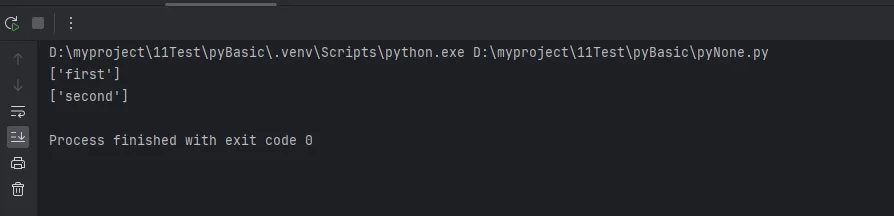
Python# 危险的写法!
def add_item(item, target_list=[]):
    target_list.append(item)
    return target_list

# 问题演示
list1 = add_item("first")
list2 = add_item("second")
print(list1)  # ['first', 'second'] - 意外的结果!
print(list2)  # ['first', 'second'] - 两个列表竟然相同
正确的写法:
Pythondef add_item(item, target_list=None):
    if target_list is None:
        target_list = []
    target_list.append(item)
    return target_list

# 正确的结果
list1 = add_item("first")
list2 = add_item("second")
print(list1)  # ['first']
print(list2)  # ['second']
🛠️ None的实战应用场景
📊 数据处理中的None应用
Pythonclass DataProcessor:
def __init__(self, data_source=None):
self.data_source = data_source
self.processed_data = None
self.error_log = None
def load_data(self, source=None):
"""加载数据,支持运行时指定数据源"""
source = source or self.data_source
if source is None:
raise ValueError("必须指定数据源")
try:
# 模拟数据加载
self.processed_data = f"从 {source} 加载的数据"
return True
except Exception as e:
self.error_log = str(e)
return False
def get_result(self):
"""获取处理结果,None表示未处理"""
return self.processed_data
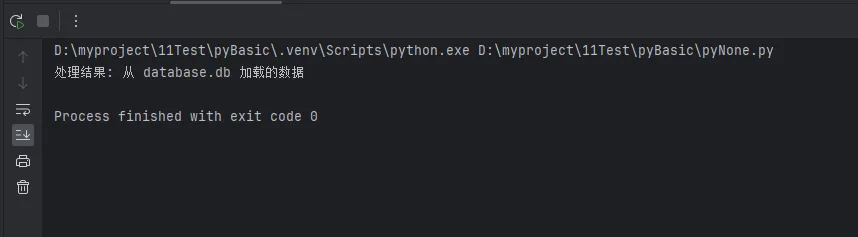
# 使用示例
processor = DataProcessor()
if processor.load_data("database.db"):
result = processor.get_result()
print(f"处理结果: {result}")
else:
print("数据加载失败")
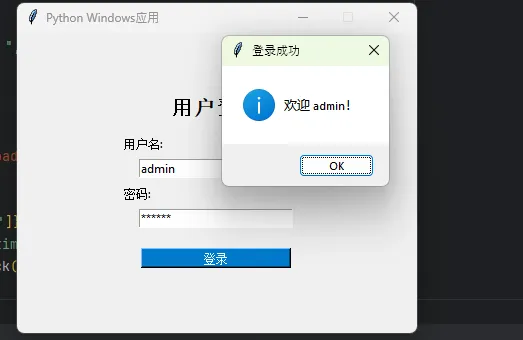
🔧 Windows应用开发中的None应用
Pythonimport tkinter as tk
from tkinter import messagebox, ttk
from datetime import datetime


class WindowsApp:
    def __init__(self):
        self.root = None
        self.config_file = None
        self.user_data = None
        self.login_frame = None
        self.main_frame = None

    def initialize(self, config_path=None):
        """初始化应用程序"""
        # 初始化主窗口
        if self.root is None:
            self.root = tk.Tk()
            self.root.title("Python Windows应用")
            self.root.geometry("400x300")
            self.root.resizable(False, False)

        # 加载配置文件
        self.config_file = config_path or "default_config.ini"

        # 用户数据初始化为None,表示未登录状态
        self.user_data = None

        # 创建界面
        self.create_login_interface()

    def create_login_interface(self):
        """创建登录界面"""
        # 清空现有界面
        for widget in self.root.winfo_children():
            widget.destroy()

        # 创建登录框架
        self.login_frame = tk.Frame(self.root, padx=50, pady=50)
        self.login_frame.pack(expand=True)

        # 标题
        title_label = tk.Label(self.login_frame, text="用户登录",
                               font=("Arial", 16, "bold"))
        title_label.pack(pady=10)

        # 用户名输入
        tk.Label(self.login_frame, text="用户名:").pack(anchor="w")
        self.username_entry = tk.Entry(self.login_frame, width=25)
        self.username_entry.pack(pady=5)

        # 密码输入
        tk.Label(self.login_frame, text="密码:").pack(anchor="w")
        self.password_entry = tk.Entry(self.login_frame, width=25, show="*")
        self.password_entry.pack(pady=5)

        # 登录按钮
        login_btn = tk.Button(self.login_frame, text="登录",
                              command=self.handle_login,
                              bg="#007ACC", fg="white", width=20)
        login_btn.pack(pady=15)

        # 提示信息
        tip_label = tk.Label(self.login_frame,
                             text="提示: 用户名: admin, 密码: 123456",
                             fg="gray", font=("Arial", 9))
        tip_label.pack()

        # 设置回车键登录
        self.root.bind('<Return>', lambda event: self.handle_login())

    def handle_login(self):
        """处理登录按钮点击"""
        username = self.username_entry.get().strip()
        password = self.password_entry.get().strip()

        if not username or not password:
            messagebox.showwarning("输入错误", "请输入用户名和密码!")
            return

        if self.login(username, password):
            messagebox.showinfo("登录成功", f"欢迎 {username}!")
            self.create_main_interface()
        else:
            messagebox.showerror("登录失败", "用户名或密码错误!")
            self.password_entry.delete(0, tk.END)  # 清空密码框

    def login(self, username, password):
        """用户登录验证"""
        if self.validate_credentials(username, password):
            self.user_data = {
                "username": username,
                "login_time": datetime.now().strftime("%Y-%m-%d %H:%M:%S")
            }
            return True
        return False

    def validate_credentials(self, username, password):
        """验证用户凭据(示例实现)"""
        return username == "admin" and password == "123456"

    def create_main_interface(self):
        """创建主界面"""
        # 清空登录界面
        for widget in self.root.winfo_children():
            widget.destroy()

        # 创建主框架
        self.main_frame = tk.Frame(self.root, padx=20, pady=20)
        self.main_frame.pack(fill=tk.BOTH, expand=True)

        # 欢迎信息
        welcome_label = tk.Label(self.main_frame,
                                 text=f"欢迎, {self.get_user_info()}!",
                                 font=("Arial", 14, "bold"))
        welcome_label.pack(pady=10)

        # 用户信息框
        info_frame = tk.LabelFrame(self.main_frame, text="用户信息", padx=10, pady=10)
        info_frame.pack(fill=tk.X, pady=10)

        tk.Label(info_frame, text=f"用户名: {self.user_data['username']}").pack(anchor="w")
        tk.Label(info_frame, text=f"登录时间: {self.user_data['login_time']}").pack(anchor="w")
        tk.Label(info_frame, text=f"配置文件: {self.config_file}").pack(anchor="w")

        # 功能按钮区域
        button_frame = tk.Frame(self.main_frame)
        button_frame.pack(pady=20)

        # 示例功能按钮
        tk.Button(button_frame, text="查看系统信息",
                  command=self.show_system_info,
                  width=15, height=2).pack(side=tk.LEFT, padx=5)

        tk.Button(button_frame, text="设置",
                  command=self.show_settings,
                  width=15, height=2).pack(side=tk.LEFT, padx=5)

        # 退出登录按钮
        logout_btn = tk.Button(self.main_frame, text="退出登录",
                               command=self.logout,
                               bg="#DC3545", fg="white", width=20)
        logout_btn.pack(side=tk.BOTTOM, pady=10)

    def show_system_info(self):
        """显示系统信息"""
        import platform
        info = f"""系统信息:
操作系统: {platform.system()}
版本: {platform.release()}
架构: {platform.machine()}
Python版本: {platform.python_version()}"""
        messagebox.showinfo("系统信息", info)

    def show_settings(self):
        """显示设置对话框"""
        settings_window = tk.Toplevel(self.root)
        settings_window.title("设置")
        settings_window.geometry("300x200")
        settings_window.resizable(False, False)

        tk.Label(settings_window, text="应用程序设置",
                 font=("Arial", 12, "bold")).pack(pady=10)

        tk.Label(settings_window, text=f"配置文件: {self.config_file}").pack(pady=5)

        # 主题选择
        theme_frame = tk.Frame(settings_window)
        theme_frame.pack(pady=10)
        tk.Label(theme_frame, text="主题:").pack(side=tk.LEFT)
        theme_var = tk.StringVar(value="默认")
        theme_combo = ttk.Combobox(theme_frame, textvariable=theme_var,
                                   values=["默认", "深色", "浅色"], state="readonly")
        theme_combo.pack(side=tk.LEFT, padx=5)

        # 确定按钮
        tk.Button(settings_window, text="确定",
                  command=settings_window.destroy).pack(pady=10)

    def logout(self):
        """用户退出登录"""
        result = messagebox.askyesno("退出登录", "确定要退出登录吗?")
        if result:
            self.user_data = None  # 清空用户数据
            self.create_login_interface()

    def is_logged_in(self):
        """检查用户是否已登录"""
        return self.user_data is not None

    def get_user_info(self):
        """获取用户信息"""
        if self.user_data is None:
            return "未登录用户"
        return self.user_data["username"]

    def run(self):
        """启动应用程序"""
        if self.root is not None:
            self.root.mainloop()


def main():
    """主函数"""
    # 创建应用程序实例
    app = WindowsApp()
    app.initialize()

    # 控制台输出状态信息
    print(f"应用程序已启动")
    print(f"登录状态: {app.is_logged_in()}")  # False
    print(f"用户信息: {app.get_user_info()}")  # 未登录用户

    # 启动GUI界面
    app.run()


if __name__ == "__main__":
    main()
🎯 高级应用:装饰器中的None处理
Pythonfrom functools import wraps
import time
def cache_result(timeout=None):
"""结果缓存装饰器,None表示永不过期"""
def decorator(func):
cache = {}
@wraps(func)
def wrapper(*args, **kwargs):
# 生成缓存键
cache_key = str(args) + str(sorted(kwargs.items()))
# 检查缓存
if cache_key in cache:
result, timestamp = cache[cache_key]
# 如果timeout为None,缓存永不过期
if timeout is None or (time.time() - timestamp) < timeout:
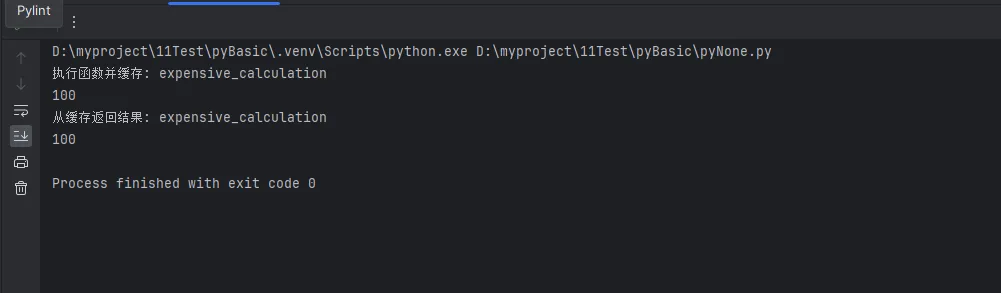
print(f"从缓存返回结果: {func.__name__}")
return result
# 执行函数并缓存结果
result = func(*args, **kwargs)
cache[cache_key] = (result, time.time())
print(f"执行函数并缓存: {func.__name__}")
return result
return wrapper
return decorator
# 使用示例
@cache_result(timeout=None) # 永久缓存
def expensive_calculation(n):
"""模拟耗时计算"""
time.sleep(1) # 模拟计算时间
return n * n
@cache_result(timeout=5) # 5秒超时
def api_call(endpoint):
"""模拟API调用"""
time.sleep(0.5)
return f"API响应: {endpoint}"
# 测试缓存效果
print(expensive_calculation(10)) # 执行并缓存
print(expensive_calculation(10)) # 从缓存返回
🔥 None使用的最佳实践
✅ 推荐做法
- 使用
is和is not比较None
Python# 正确
if value is None:
    handle_none_case()

if value is not None:
    process_value(value)

# 避免使用 ==
# if value == None:  # 不推荐
- 合理使用None作为哨兵值
Pythondef find_user(user_id, default=None):
    """查找用户,未找到时返回default值"""
    # 查找逻辑
    user = search_in_database(user_id)
    return user if user else default

# 调用时可以区分"未找到"和"找到了空值"
user = find_user(123)
if user is None:
    print("用户不存在")
else:
    print(f"找到用户: {user}")
- 文档字符串中明确None的含义
Pythondef process_file(file_path, encoding=None):
    """
    处理文件内容

    Args:
        file_path (str): 文件路径
        encoding (str, None): 文件编码,None表示使用系统默认编码

    Returns:
        str: 处理后的内容,处理失败时返回None
    """
    if encoding is None:
        encoding = 'utf-8'  # 系统默认编码

    try:
        with open(file_path, 'r', encoding=encoding) as f:
            return f.read().strip()
    except Exception:
        return None  # 明确表示处理失败
⚡ 性能优化技巧
Python# 高效的None检查和处理
def optimize_none_handling(data_list):
"""优化的None处理示例"""
# 使用列表推导式过滤None
valid_data = [item for item in data_list if item is not None]
# 使用or操作符提供默认值
def get_value(item, default="默认值"):
return item or default
# 批量处理None值
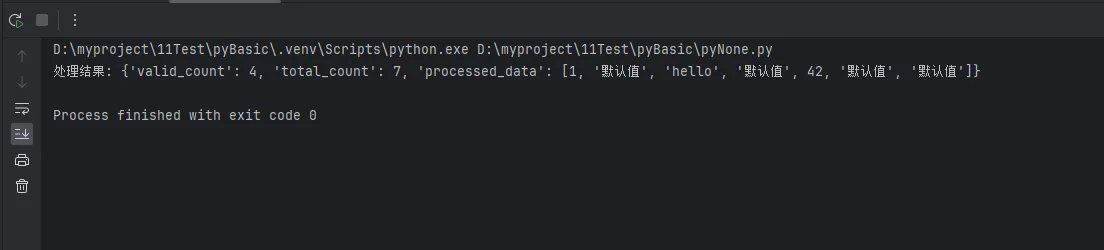
processed = [get_value(item) for item in data_list]
return {
'valid_count': len(valid_data),
'total_count': len(data_list),
'processed_data': processed
}
# 测试数据
test_data = [1, None, "hello", None, 42, "", None]
result = optimize_none_handling(test_data)
print(f"处理结果: {result}")
🎯 总结:掌握None的三个核心要点
通过本文的深入解析,我们全面了解了Python中None的设计原理和实际应用。让我们总结三个关键要点:
1. 单例设计的智慧:None采用单例模式,确保内存效率和比较操作的高性能,这是Python语言设计的精妙之处。
2. 缺省值的最佳实践:使用None作为函数参数默认值,避免可变对象陷阱,让你的代码更加安全可靠。
3. 语义表达的准确性:None不仅仅是"空值",更是一种明确的语义表达,代表"无"、"未初始化"或"操作失败"等含义。
掌握None的正确使用方式,不仅能让你的Python代码更加专业,还能避免许多常见的编程陷阱。在Windows应用开发和数据处理项目中,合理运用None将大大提升代码的健壮性和可维护性。
继续深入学习Python的其他高级特性,如装饰器、上下文管理器等,将让你的编程技能更上一层楼!
本文作者:技术老小子
本文链接:
版权声明:本博客所有文章除特别声明外,均采用 BY-NC-SA 许可协议。转载请注明出处!
目录