
Press Ctrl+ and K to search
目录
在Python桌面开发中,按钮控件是用户交互的核心组件。无论你是开发数据处理工具、设备控制软件还是管理系统,Button控件都是必不可少的界面元素。本文将从零开始,深入解析Tkinter Button控件的使用方法,帮助你快速掌握Python GUI开发的核心技能。通过实际案例和最佳实践,让你的Python开发技能更上一层楼,为后续的上位机开发打下坚实基础。
🎯 Button控件核心概念
什么是Button控件
Button控件是Tkinter中最基础的交互组件,它允许用户通过点击触发特定的功能。在实际的Python开发项目中,按钮承担着连接用户操作和程序逻辑的重要桥梁作用。
Button控件的本质
从技术角度看,Button是一个可点击的矩形区域,包含文本、图片或两者的组合。当用户点击时,会触发绑定的回调函数,执行相应的业务逻辑。
🔧 基础语法与参数详解
创建Button的标准语法
Pythonimport tkinter as tk

button = tk.Button(parent, option=value, ...)
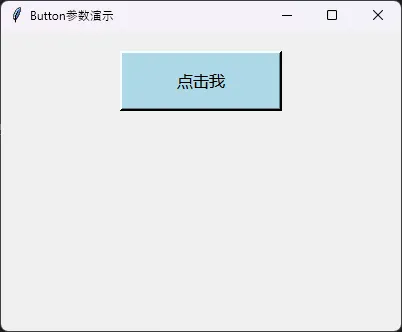
核心参数全览
Pythonimport tkinter as tk

root = tk.Tk()
root.title("Button参数演示")
root.geometry("400x300")

# 基础按钮
basic_button = tk.Button(
    root,
    text="点击我",           # 按钮文本
    command=lambda: print("按钮被点击!"),  # 点击回调函数
    width=15,               # 宽度(字符数)
    height=2,               # 高度(文本行数)
    bg="lightblue",         # 背景色
    fg="black",             # 前景色(文字颜色)
    font=("微软雅黑", 12),   # 字体设置
    relief="raised",        # 边框样式
    bd=3,                   # 边框宽度
    state="normal"          # 状态:normal, disabled, active
)
basic_button.pack(pady=20)

root.mainloop()
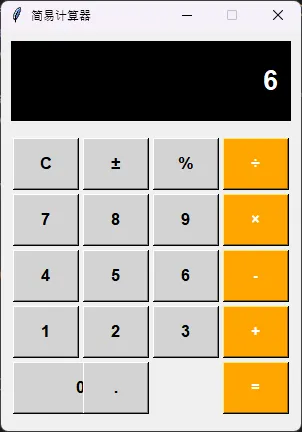
💻 实战案例1:计算器按钮布局
让我们通过一个实际的计算器界面来理解Button的布局应用:
Pythonimport tkinter as tk
from tkinter import messagebox

class SimpleCalculator:
    def __init__(self):
        self.root = tk.Tk()
        self.root.title("简易计算器")
        self.root.geometry("300x400")
        self.root.resizable(False, False)

        # 显示屏
        self.display_var = tk.StringVar()
        self.display_var.set("0")

        # 创建界面
        self.create_display()
        self.create_buttons()

    def create_display(self):
        """创建显示屏"""
        display_frame = tk.Frame(self.root, bg="black", height=80)
        display_frame.pack(fill="x", padx=10, pady=10)
        display_frame.pack_propagate(False)

        display_label = tk.Label(
            display_frame,
            textvariable=self.display_var,
            font=("Arial", 20, "bold"),
            bg="black",
            fg="white",
            anchor="e"
        )
        display_label.pack(fill="both", expand=True, padx=10, pady=10)

    def create_buttons(self):
        """创建按钮布局"""
        # 按钮配置
        button_config = {
            'font': ('Arial', 12, 'bold'),
            'width': 5,
            'height': 2
        }

        # 创建按钮框架
        button_frame = tk.Frame(self.root)
        button_frame.pack(fill="both", expand=True, padx=10, pady=5)

        # 按钮布局定义
        buttons = [
            ['C', '±', '%', '÷'],
            ['7', '8', '9', '×'],
            ['4', '5', '6', '-'],
            ['1', '2', '3', '+'],
            ['0', '.', '=']
        ]

        # 创建按钮
        for i, row in enumerate(buttons):
            for j, btn_text in enumerate(row):
                if btn_text == '0':
                    # 数字0占两列
                    btn = tk.Button(
                        button_frame,
                        text=btn_text,
                        command=lambda t=btn_text: self.button_click(t),
                        **button_config,
                        bg="lightgray"
                    )
                    btn.grid(row=i, column=j, columnspan=2,
                            sticky="ew", padx=2, pady=2)
                elif btn_text == '=':
                    # 等号按钮
                    btn = tk.Button(
                        button_frame,
                        text=btn_text,
                        command=lambda t=btn_text: self.button_click(t),
                        **button_config,
                        bg="orange",
                        fg="white"
                    )
                    btn.grid(row=i, column=j+1,
                            sticky="ew", padx=2, pady=2)
                else:
                    # 其他按钮
                    color = "orange" if btn_text in ['÷', '×', '-', '+'] else "lightgray"
                    btn = tk.Button(
                        button_frame,
                        text=btn_text,
                        command=lambda t=btn_text: self.button_click(t),
                        **button_config,
                        bg=color,
                        fg="white" if color == "orange" else "black"
                    )
                    btn.grid(row=i, column=j,
                            sticky="ew", padx=2, pady=2)

        # 配置列权重
        for i in range(4):
            button_frame.columnconfigure(i, weight=1)

    def button_click(self, value):
        """按钮点击处理"""
        current = self.display_var.get()

        if value == 'C':
            self.display_var.set("0")
        elif value.isdigit() or value == '.':
            if current == "0":
                self.display_var.set(value)
            else:
                self.display_var.set(current + value)
        elif value == '=':
            try:
                # 简化的计算逻辑
                expression = current.replace('×', '*').replace('÷', '/')
                result = eval(expression)
                self.display_var.set(str(result))
            except:
                messagebox.showerror("错误", "计算错误")
                self.display_var.set("0")
        else:
            # 运算符处理
            self.display_var.set(current + value)

    def run(self):
        self.root.mainloop()

# 运行计算器
if __name__ == "__main__":
    calc = SimpleCalculator()
    calc.run()
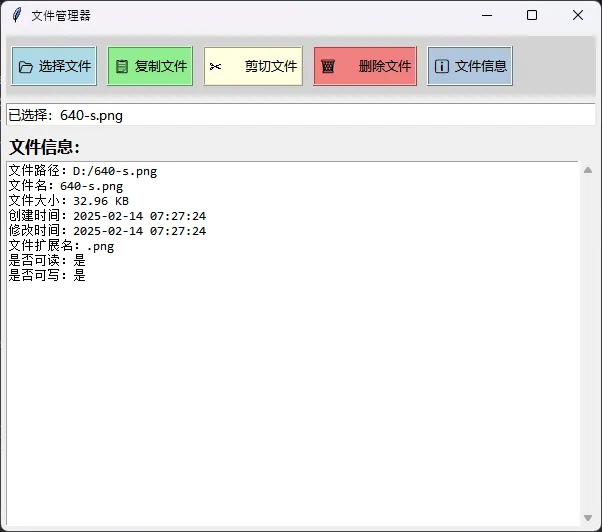
🎨 实战案例2:文件操作工具
这个案例展示了Button在实际文件处理项目中的应用:
Pythonimport time
import tkinter as tk
from tkinter import filedialog, messagebox, scrolledtext
import os
import shutil


class FileManager:
    def __init__(self):
        self.root = tk.Tk()
        self.root.title("文件管理器")
        self.root.geometry("600x500")

        # 当前选择的文件路径
        self.current_file = None

        self.create_interface()

    def create_interface(self):
        """创建主界面"""
        # 顶部按钮区域
        top_frame = tk.Frame(self.root, bg="lightgray", height=60)
        top_frame.pack(fill="x", padx=5, pady=5)
        top_frame.pack_propagate(False)

        # 按钮样式配置
        btn_style = {
            'font': ('微软雅黑', 10),
            'height': 2,
            'relief': 'ridge',
            'bd': 2
        }

        # 文件操作按钮
        buttons = [
            ("📂 选择文件", self.select_file, "lightblue"),
            ("📋 复制文件", self.copy_file, "lightgreen"),
            ("✂️ 剪切文件", self.cut_file, "lightyellow"),
            ("🗑️ 删除文件", self.delete_file, "lightcoral"),
            ("ℹ️ 文件信息", self.show_file_info, "lightsteelblue")
        ]

        for i, (text, command, color) in enumerate(buttons):
            btn = tk.Button(
                top_frame,
                text=text,
                command=command,
                bg=color,
                **btn_style
            )
            btn.pack(side="left", padx=5, pady=10, fill="y")

        # 状态显示区域
        self.status_label = tk.Label(
            self.root,
            text="请选择一个文件",
            bg="white",
            relief="sunken",
            bd=1,
            anchor="w",
            font=('微软雅黑', 10)
        )
        self.status_label.pack(fill="x", padx=5, pady=2)

        # 文件信息显示区域
        info_frame = tk.Frame(self.root)
        info_frame.pack(fill="both", expand=True, padx=5, pady=5)

        tk.Label(info_frame, text="文件信息:", font=('微软雅黑', 12, 'bold')).pack(anchor="w")

        self.info_text = scrolledtext.ScrolledText(
            info_frame,
            height=20,
            font=('Consolas', 10),
            wrap=tk.WORD
        )
        self.info_text.pack(fill="both", expand=True)

    def select_file(self):
        """选择文件"""
        file_path = filedialog.askopenfilename(
            title="选择文件",
            filetypes=[
                ("所有文件", "*.*"),
                ("文本文件", "*.txt"),
                ("Python文件", "*.py"),
                ("图片文件", "*.jpg;*.png;*.gif")
            ]
        )

        if file_path:
            self.current_file = file_path
            self.status_label.config(text=f"已选择:{os.path.basename(file_path)}")
            self.update_file_info()

    def copy_file(self):
        """复制文件"""
        if not self.current_file:
            messagebox.showwarning("警告", "请先选择一个文件")
            return

        save_path = filedialog.asksaveasfilename(
            title="复制文件到...",
            defaultextension=os.path.splitext(self.current_file)[1],
            initialfile=f"copy_{os.path.basename(self.current_file)}"
        )

        if save_path:
            try:
                shutil.copy2(self.current_file, save_path)
                messagebox.showinfo("成功", f"文件已复制到:\n{save_path}")
            except Exception as e:
                messagebox.showerror("错误", f"复制失败:{str(e)}")

    def cut_file(self):
        """剪切文件"""
        if not self.current_file:
            messagebox.showwarning("警告", "请先选择一个文件")
            return

        save_path = filedialog.asksaveasfilename(
            title="移动文件到...",
            defaultextension=os.path.splitext(self.current_file)[1],
            initialfile=os.path.basename(self.current_file)
        )

        if save_path:
            try:
                shutil.move(self.current_file, save_path)
                messagebox.showinfo("成功", f"文件已移动到:\n{save_path}")
                self.current_file = None
                self.status_label.config(text="请选择一个文件")
                self.info_text.delete(1.0, tk.END)
            except Exception as e:
                messagebox.showerror("错误", f"移动失败:{str(e)}")

    def delete_file(self):
        """删除文件"""
        if not self.current_file:
            messagebox.showwarning("警告", "请先选择一个文件")
            return

        if messagebox.askyesno("确认", f"确定要删除文件吗?\n{self.current_file}"):
            try:
                os.remove(self.current_file)
                messagebox.showinfo("成功", "文件已删除")
                self.current_file = None
                self.status_label.config(text="请选择一个文件")
                self.info_text.delete(1.0, tk.END)
            except Exception as e:
                messagebox.showerror("错误", f"删除失败:{str(e)}")

    def show_file_info(self):
        """显示文件详细信息"""
        if not self.current_file:
            messagebox.showwarning("警告", "请先选择一个文件")
            return

        self.update_file_info()

    def update_file_info(self):
        """更新文件信息显示"""
        if not self.current_file or not os.path.exists(self.current_file):
            return

        try:
            stat = os.stat(self.current_file)
            size = stat.st_size

            # 格式化文件大小
            if size < 1024:
                size_str = f"{size} B"
            elif size < 1024 * 1024:
                size_str = f"{size / 1024:.2f} KB"
            else:
                size_str = f"{size / (1024 * 1024):.2f} MB"

            info = f"""文件路径:{self.current_file}
文件名:{os.path.basename(self.current_file)}
文件大小:{size_str}
创建时间:{time.strftime('%Y-%m-%d %H:%M:%S', time.localtime(stat.st_ctime))}
修改时间:{time.strftime('%Y-%m-%d %H:%M:%S', time.localtime(stat.st_mtime))}
文件扩展名:{os.path.splitext(self.current_file)[1]}
是否可读:{'是' if os.access(self.current_file, os.R_OK) else '否'}
是否可写:{'是' if os.access(self.current_file, os.W_OK) else '否'}
"""

            self.info_text.delete(1.0, tk.END)
            self.info_text.insert(1.0, info)

        except Exception as e:
            messagebox.showerror("错误", f"获取文件信息失败:{str(e)}")

    def run(self):
        self.root.mainloop()


# 运行文件管理器
if __name__ == "__main__":
    app = FileManager()
    app.run()
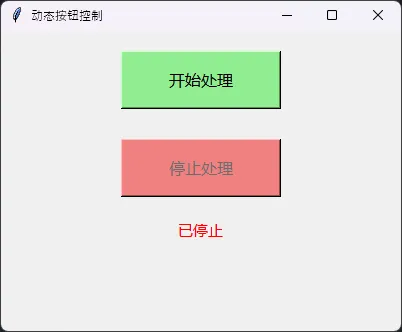
🎯 高级技巧与最佳实践
动态按钮状态控制
Pythonimport tkinter as tk
import threading
import time

class DynamicButtonDemo:
    def __init__(self):
        self.root = tk.Tk()
        self.root.title("动态按钮控制")
        self.root.geometry("400x300")

        # 按钮状态标志
        self.is_processing = False

        self.create_buttons()

    def create_buttons(self):
        """创建动态控制按钮"""
        # 处理按钮
        self.process_btn = tk.Button(
            self.root,
            text="开始处理",
            command=self.start_process,
            font=('微软雅黑', 12),
            bg="lightgreen",
            width=15,
            height=2
        )
        self.process_btn.pack(pady=20)

        # 停止按钮(初始禁用)
        self.stop_btn = tk.Button(
            self.root,
            text="停止处理",
            command=self.stop_process,
            font=('微软雅黑', 12),
            bg="lightcoral",
            width=15,
            height=2,
            state="disabled"  # 初始禁用
        )
        self.stop_btn.pack(pady=10)

        # 状态标签
        self.status_label = tk.Label(
            self.root,
            text="就绪",
            font=('微软雅黑', 11),
            fg="green"
        )
        self.status_label.pack(pady=10)

    def start_process(self):
        """开始处理"""
        if self.is_processing:
            return

        self.is_processing = True

        # 更新按钮状态
        self.process_btn.config(state="disabled", text="处理中...")
        self.stop_btn.config(state="normal")

        # 更新状态
        self.status_label.config(text="正在处理...", fg="orange")

        # 在新线程中执行耗时操作
        thread = threading.Thread(target=self.simulate_process)
        thread.daemon = True
        thread.start()

    def simulate_process(self):
        """模拟处理过程"""
        for i in range(10):
            if not self.is_processing:
                break

            # 更新进度
            self.root.after(0, lambda i=i: self.status_label.config(
                text=f"处理中... {(i+1)*10}%"
            ))

            time.sleep(1)  # 模拟处理时间

        # 处理完成
        if self.is_processing:
            self.root.after(0, self.process_completed)

    def stop_process(self):
        """停止处理"""
        self.is_processing = False

        # 重置按钮状态
        self.process_btn.config(state="normal", text="开始处理")
        self.stop_btn.config(state="disabled")

        # 更新状态
        self.status_label.config(text="已停止", fg="red")

    def process_completed(self):
        """处理完成"""
        self.is_processing = False

        # 重置按钮状态
        self.process_btn.config(state="normal", text="开始处理")
        self.stop_btn.config(state="disabled")

        # 更新状态
        self.status_label.config(text="处理完成", fg="green")

    def run(self):
        self.root.mainloop()

# 运行演示
if __name__ == "__main__":
    demo = DynamicButtonDemo()
    demo.run()
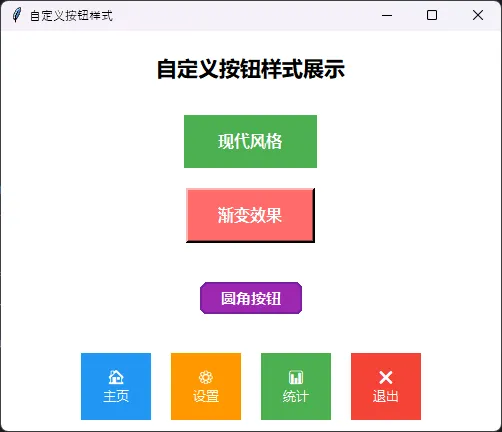
自定义按钮样式
Pythonimport tkinter as tk

class CustomButtonStyles:
    def __init__(self):
        self.root = tk.Tk()
        self.root.title("自定义按钮样式")
        self.root.geometry("500x400")
        self.root.config(bg="white")

        self.create_styled_buttons()

    def create_styled_buttons(self):
        """创建各种样式的按钮"""

        # 标题
        title_label = tk.Label(
            self.root,
            text="自定义按钮样式展示",
            font=('微软雅黑', 16, 'bold'),
            bg="white"
        )
        title_label.pack(pady=20)

        # 现代风格按钮
        modern_btn = tk.Button(
            self.root,
            text="现代风格",
            font=('微软雅黑', 12, 'bold'),
            bg="#4CAF50",
            fg="white",
            relief="flat",
            bd=0,
            padx=30,
            pady=10,
            cursor="hand2"
        )
        modern_btn.pack(pady=10)

        # 绑定hover效果
        def on_enter(e):
            modern_btn.config(bg="#45a049")
        def on_leave(e):
            modern_btn.config(bg="#4CAF50")

        modern_btn.bind("<Enter>", on_enter)
        modern_btn.bind("<Leave>", on_leave)

        # 渐变效果按钮(模拟)
        gradient_frame = tk.Frame(self.root, bg="white")
        gradient_frame.pack(pady=10)

        gradient_btn = tk.Button(
            gradient_frame,
            text="渐变效果",
            font=('微软雅黑', 12, 'bold'),
            bg="#FF6B6B",
            fg="white",
            relief="raised",
            bd=3,
            padx=25,
            pady=8
        )
        gradient_btn.pack()

        # 圆角按钮(使用Canvas模拟)
        canvas = tk.Canvas(self.root, width=200, height=60, bg="white", highlightthickness=0)
        canvas.pack(pady=15)

        # 绘制圆角矩形
        def create_rounded_button(canvas, x1, y1, x2, y2, r=10, **kwargs):
            points = []
            for x, y in [(x1, y1 + r), (x1, y1), (x1 + r, y1),
                        (x2 - r, y1), (x2, y1), (x2, y1 + r),
                        (x2, y2 - r), (x2, y2), (x2 - r, y2),
                        (x1 + r, y2), (x1, y2), (x1, y2 - r)]:
                points.extend([x, y])
            return canvas.create_polygon(points, smooth=True, **kwargs)

        # 创建圆角按钮背景
        rounded_bg = create_rounded_button(
            canvas, 50, 15, 150, 45, r=15,
            fill="#9C27B0", outline="#7B1FA2", width=2
        )

        # 添加文字
        canvas.create_text(100, 30, text="圆角按钮",
                          fill="white", font=('微软雅黑', 11, 'bold'))

        # 图标按钮
        icon_frame = tk.Frame(self.root, bg="white")
        icon_frame.pack(pady=10)

        # 模拟图标按钮
        icon_buttons = [
            ("🏠", "主页", "#2196F3"),
            ("⚙️", "设置", "#FF9800"),
            ("📊", "统计", "#4CAF50"),
            ("❌", "退出", "#F44336")
        ]

        for icon, text, color in icon_buttons:
            btn_frame = tk.Frame(icon_frame, bg="white")
            btn_frame.pack(side="left", padx=10)

            btn = tk.Button(
                btn_frame,
                text=f"{icon}\n{text}",
                font=('微软雅黑', 10),
                bg=color,
                fg="white",
                relief="flat",
                bd=0,
                width=8,
                height=3,
                cursor="hand2"
            )
            btn.pack()

    def run(self):
        self.root.mainloop()

# 运行样式演示
if __name__ == "__main__":
    demo = CustomButtonStyles()
    demo.run()
🎯 总结
通过本文的深入学习,我们全面掌握了Python Tkinter Button控件的核心技能。从基础的按钮创建到复杂的文件管理器开发,每个实例都体现了编程技巧在实际项目中的应用价值。
三个核心要点:
- 基础扎实:熟练掌握Button的参数配置和事件绑定机制
- 实战导向:通过计算器和文件管理器项目,理解Button在复杂界面中的应用
- 优化意识:关注性能优化和用户体验,为上位机开发奠定基础
掌握了Button控件,你已经迈出了Python GUI开发的重要一步。结合本文的实战案例和最佳实践,相信你能够开发出更加专业和实用的桌面应用程序。继续深入学习其他Tkinter控件,你的Python开发技能将会更加全面和深入!
本文作者:技术老小子
本文链接:
版权声明:本博客所有文章除特别声明外,均采用 BY-NC-SA 许可协议。转载请注明出处!
目录