
目录
🏭 当设备不说"普通话"时,我们怎么办?
做过工控项目的人都知道那种感觉——拿到一份厚厚的设备手册,翻到通信协议那章,密密麻麻的寄存器地址、功能码、CRC校验……脑子里第一反应往往是:这玩意儿能用Python搞定吗?
答案是:完全可以。而且比你想象的优雅得多。
工业现场的设备——PLC、变频器、仪表、机器人控制器——它们说的"语言"和我们写Web应用时用的HTTP、JSON差了十万八千里。Modbus、OPC UA、Profinet、EtherNet/IP,这些协议名字听起来像上个世纪的产物(有些确实是),但它们今天仍然跑在全球数以亿计的工厂设备上。
本文会带你把这几个最主流的工业协议从原理到Python实现走一遍。不是泛泛而谈,是真的能跑起来的代码,配上我在项目中踩过的坑。
🔌 先搞清楚:工业协议到底在解决什么问题
普通网络协议追求的是高吞吐、低延迟、易扩展。工业协议的优先级完全不同——确定性、可靠性、实时性才是命根子。
一条Modbus指令从发出到收到响应,必须在可预期的时间窗口内完成。误差几毫秒可能无所谓,但如果一个控制指令因为网络抖动延迟了500ms,生产线上的结果可能是废品,严重的是安全事故。
所以工业协议的设计哲学是:简单、确定、可验证。这也是为什么Modbus这个1979年发明的协议到今天还活得好好的——它足够简单,简单到几乎没有出错的余地。
📡 Modbus:工业界的"普通话"
协议基础
Modbus有三种变体:RTU(串口,二进制)、ASCII(串口,文本)、TCP(以太网)。现代项目里Modbus TCP最常见,但产线上的老设备很多还在用RTU。
协议结构极其简洁:
[设备地址][功能码][数据区][校验码]
功能码决定你要做什么——读线圈(01)、读保持寄存器(03)、写单个寄存器(06)、写多个寄存器(16)。就这几个,覆盖了80%的使用场景。
Python实现:pymodbus
pymodbus 是Python生态里最成熟的Modbus库,支持TCP和RTU,异步接口也有。
安装:
bashpip install pymodbus
Modbus TCP 读取寄存器:
pythonfrom pymodbus.client import ModbusTcpClient
from pymodbus.exceptions import ModbusException
import struct
def read_device_registers(host: str, port: int = 502,
slave_id: int = 1) -> dict:
"""
读取设备保持寄存器
实际项目中,寄存器地址和含义需要对照设备手册
""" client = ModbusTcpClient(host=host, port=port, timeout=3)
result = {}
try:
if not client.connect():
raise ConnectionError(f"无法连接到设备 {host}:{port}")
# 读取从地址0开始的10个保持寄存器(功能码03)
response = client.read_holding_registers(
address=0,
count=10,
device_id=slave_id
)
if response.isError():
raise ModbusException(f"读取失败: {response}")
registers = response.registers
# 假设设备手册定义:
# 寄存器0: 运行状态 (0=停止, 1=运行, 2=故障)
# 寄存器1-2: 当前转速 (32位浮点数,大端)
# 寄存器3: 输出频率 (整数,单位0.1Hz)
result['status'] = registers[0]
# 32位浮点数需要合并两个16位寄存器
raw_speed = (registers[1] << 16) | registers[2]
result['speed_rpm'] = struct.unpack('>f',
struct.pack('>I', raw_speed))[0]
result['frequency_hz'] = registers[3] / 10.0
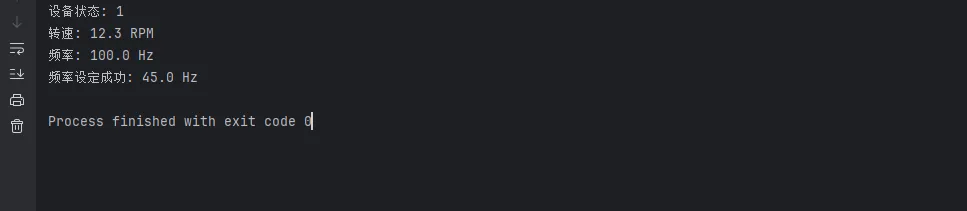
print(f"设备状态: {result['status']}")
print(f"转速: {result['speed_rpm']:.1f} RPM")
print(f"频率: {result['frequency_hz']:.1f} Hz")
except ModbusException as e:
print(f"Modbus通信异常: {e}")
except Exception as e:
print(f"未知错误: {e}")
finally:
client.close()
return result
def write_frequency_setpoint(host: str, frequency: float,
slave_id: int = 1) -> bool:
"""
写入频率设定值
frequency: 目标频率,单位Hz,范围0.0-60.0
""" client = ModbusTcpClient(host=host, port=502, timeout=3)
try:
client.connect()
# 频率值转换:设备接受整数,单位0.1Hz
# 50.0Hz → 500
setpoint = int(frequency * 10)
# 写单个寄存器(功能码06),地址100为频率设定
response = client.write_register(
address=100,
value=setpoint,
device_id=slave_id
)
if response.isError():
print(f"写入失败: {response}")
return False
print(f"频率设定成功: {frequency} Hz")
return True
finally:
client.close()
if __name__ == "__main__":
# 测试连接(替换为实际设备IP)
data = read_device_registers("127.0.0.1")
write_frequency_setpoint("127.0.0.1", 45.0)
Modbus RTU(串口):
pythonfrom pymodbus.client import ModbusSerialClient

def connect_rtu_device(port: str = "COM3") -> None:
    """
    串口Modbus RTU连接
    波特率、数据位、校验位必须与设备手册一致,差一个字节都连不上
    """
    client = ModbusSerialClient(
        port=port,
        baudrate=9600,       # 常见:9600, 19200, 38400
        bytesize=8,          # 数据位
        parity='N',          # 校验:N无, E偶, O奇
        stopbits=1,          # 停止位
        timeout=1
    )

    if client.connect():
        response = client.read_holding_registers(
            address=0, count=5, device_id=1
        )
        print(f"寄存器数据: {response.registers}")
        client.close()
    else:
        print(f"串口 {port} 连接失败,检查设备连接和参数配置")
⚠️ 踩坑预警
坑1:字节序问题。 32位数据拆成两个16位寄存器时,高字在前还是低字在前,不同厂商的实现不一样。我见过同一型号不同批次的设备字节序都不同。拿到数据先打印原始寄存器值,对照手册慢慢验证。
坑2:超时设置。 工业现场网络质量参差不齐,timeout设1秒往往不够。我一般设3秒,重试3次。
坑3:从站地址(slave id)。 默认1,但如果你接的是多设备总线,每台设备地址不同,写错地址要么没响应要么读到别的设备的数据。
🌐 OPC UA:工业4.0的"外交官"
Modbus够用,但它太"哑"了——你得自己知道寄存器100是什么意思。OPC UA不同,它是自描述的。连上去之后,设备会告诉你它有哪些节点、每个节点叫什么名字、数据类型是什么。
这就是为什么工业4.0、数字孪生、MES系统这些场景里OPC UA出现频率这么高。它不只是传数据,它在传有语义的数据。
Python实现:opcua-asyncio
bashpip install asyncua
pythonimport asyncio
from asyncua import Client, ua
from asyncua.common.node import Node
import logging

logging.basicConfig(level=logging.WARNING)


async def browse_server_nodes(url: str) -> None:
    """
    浏览OPC UA服务器的节点树
    第一次对接新设备时,这个函数能救你的命
    """    async with Client(url=url) as client:
        print(f"已连接: {url}")
        print(f"服务器名称: {client.application_uri}")

        # 从根节点开始浏览 - 这些方法不需要await
        root = client.get_root_node()
        objects = client.get_objects_node()  # 移除await

        print("\n=== 节点树 ===")
        await _browse_recursive(objects, depth=0, max_depth=3)


async def _browse_recursive(node: Node, depth: int,
                            max_depth: int) -> None:
    """递归浏览节点,控制深度避免无限展开"""
    if depth > max_depth:
        return

    try:
        children = await node.get_children()
        for child in children:
            name = await child.read_browse_name()
            node_class = await child.read_node_class()

            indent = "  " * depth
            print(f"{indent}├─ {name.Name} [{node_class.name}]")

            # 只递归展开对象节点,变量节点直接读值
            if node_class == ua.NodeClass.Variable:
                try:
                    value = await child.read_value()
                    print(f"{indent}   └─ 值: {value}")
                except Exception:
                    pass
            else:
                await _browse_recursive(child, depth + 1, max_depth)
    except Exception as e:
        pass  # 部分节点可能无读取权限,静默跳过


async def read_plc_data(url: str) -> dict:
    """
    读取PLC数据节点
    node_id格式:ns=命名空间索引;s=节点字符串标识符
    """    async with Client(url=url) as client:

        # 通过节点ID直接访问(需要事先知道节点ID)
        # 不同设备的节点ID格式不同,有的用字符串,有的用数字
        nodes_to_read = {
            "motor_speed": "ns=2;s=Device1.Motor.Speed",
            "motor_temp": "ns=2;s=Device1.Motor.Temperature",
            "conveyor_state": "ns=2;s=Device1.Conveyor.Running",
            "production_cnt": "ns=2;s=Device1.Counter.Production",
        }

        data = {}
        for key, node_id in nodes_to_read.items():
            try:
                node = client.get_node(node_id)
                value = await node.read_value()
                data[key] = value
                print(f"{key}: {value}")
            except ua.UaError as e:
                print(f"节点 {node_id} 读取失败: {e}")
                data[key] = None

        return data


async def subscribe_to_changes(url: str,
                               node_id: str,
                               duration_seconds: int = 30) -> None:
    """
    订阅节点变化——这是OPC UA最强大的功能之一
    不用轮询,设备主动推送数据变化
    """
    class DataChangeHandler:
        """数据变化回调处理器"""

        def datachange_notification(self, node, val, data):
            print(f"[{node}] 数据变化: {val} "
                  f"(时间戳: {data.monitored_item.Value.SourceTimestamp})")

    async with Client(url=url) as client:
        handler = DataChangeHandler()

        # 创建订阅,500ms采样间隔
        subscription = await client.create_subscription(
            period=500,  # 毫秒
            handler=handler
        )

        node = client.get_node(node_id)

        # 订阅节点,数据变化时自动触发回调
        handle = await subscription.subscribe_data_change(node)

        print(f"已订阅节点 {node_id},等待数据变化...")
        await asyncio.sleep(duration_seconds)

        # 取消订阅,清理资源
        await subscription.unsubscribe(handle)
        await subscription.delete()


if __name__ == "__main__":
    OPC_UA_URL = "opc.tcp://127.0.0.1:49320"

    # 先浏览节点树,了解设备结构
    asyncio.run(browse_server_nodes(OPC_UA_URL))

    # 读取具体数据
    asyncio.run(read_plc_data(OPC_UA_URL))

    # 订阅数据变化(30秒)
    asyncio.run(subscribe_to_changes(
        OPC_UA_URL,
        "ns=2;s=LMES.W1.Progress",
        30
    ))
⚠️ 踩坑预警
坑1:安全模式。 生产环境的OPC UA服务器通常开启了安全策略(证书认证)。上面代码用的是无安全模式,只适合调试。正式项目需要配置客户端证书,asyncua文档里有详细说明,别跳过。
坑2:命名空间索引不固定。 ns=2 这个数字在不同服务器重启后可能变化。正确做法是通过命名空间URI查询索引,不要硬编码。
⚡ 异步架构:同时管理多台设备
真实项目里,你不会只连一台设备。一条产线可能有十几台变频器、几个PLC、若干仪表。轮询这些设备如果用同步代码,一台设备响应慢会阻塞整条链路。
pythonimport asyncio
from pymodbus.client import AsyncModbusTcpClient
from dataclasses import dataclass, field
from typing import Optional
import time
@dataclass
class DeviceConfig:
name: str
host: str
port: int = 502
device_id: int = 1
poll_interval: float = 1.0 # 秒
@dataclass
class DeviceData:
name: str
timestamp: float
registers: list
is_online: bool = True
error: Optional[str] = None
async def poll_single_device(config: DeviceConfig,
results: dict) -> None:
"""
异步轮询单台Modbus设备
每台设备独立运行,互不阻塞
"""
client = AsyncModbusTcpClient(
host=config.host,
port=config.port,
timeout=3
)
while True:
try:
await client.connect()
response = await client.read_holding_registers(
address=0, count=10, device_id=config.device_id
)
if not response.isError():
results[config.name] = DeviceData(
name=config.name,
timestamp=time.time(),
registers=response.registers,
is_online=True
)
else:
results[config.name] = DeviceData(
name=config.name,
timestamp=time.time(),
registers=[],
is_online=False,
error=str(response)
)
except Exception as e:
results[config.name] = DeviceData(
name=config.name,
timestamp=time.time(),
registers=[],
is_online=False,
error=str(e)
)
finally:
client.close()
await asyncio.sleep(config.poll_interval)
async def monitor_production_line(devices: list[DeviceConfig]) -> None:
"""
并发监控整条产线的所有设备
"""
results = {}
# 为每台设备创建独立的轮询任务
tasks = [
asyncio.create_task(poll_single_device(device, results))
for device in devices
]
# 定期打印汇总状态
async def print_status():
while True:
await asyncio.sleep(5)
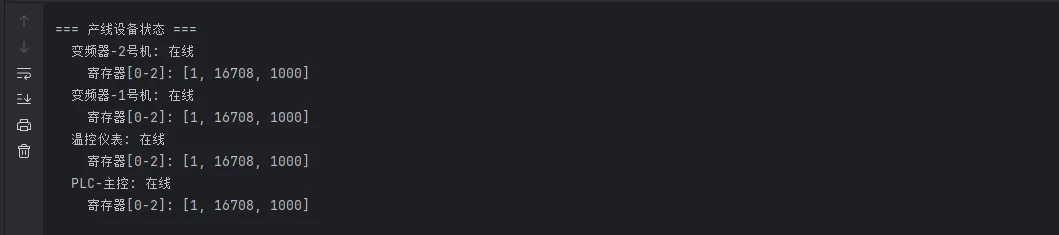
print("\n=== 产线设备状态 ===")
for name, data in results.items():
status = "在线" if data.is_online else f"离线({data.error})"
print(f" {name}: {status}")
if data.is_online and data.registers:
print(f" 寄存器[0-2]: {data.registers[:3]}")
tasks.append(asyncio.create_task(print_status()))
# 运行直到手动中断
try:
await asyncio.gather(*tasks)
except asyncio.CancelledError:
for task in tasks:
task.cancel()
if __name__ == "__main__":
production_line = [
DeviceConfig("变频器-1号机", "192.168.1.101", poll_interval=0.5),
DeviceConfig("变频器-2号机", "192.168.1.102", poll_interval=0.5),
DeviceConfig("PLC-主控", "192.168.1.110", poll_interval=0.2),
DeviceConfig("温控仪表", "192.168.1.120", poll_interval=2.0),
]
asyncio.run(monitor_production_line(production_line))
这个架构的好处很明显:每台设备的轮询周期可以独立配置,某台设备超时或离线不会影响其他设备的采集。我在一个有23台设备的项目里用这个方案,CPU占用率不到5%,比之前的多线程方案降了一半。
🛡️ 生产环境必备:重连与异常处理
设备会掉线。网线会松。交换机会重启。这些都是工厂里的日常。你的程序必须能优雅地处理这些情况,而不是崩掉。
pythonimport asyncio
import logging
from functools import wraps
from typing import Callable, Any
# 配置日志
logging.basicConfig(
level=logging.INFO,
format='%(asctime)s - %(levelname)s - %(message)s'
)
logger = logging.getLogger(__name__)
def with_retry(max_retries: int = 3,
delay: float = 1.0,
backoff: float = 2.0):
"""
带指数退避的重试装饰器
delay: 初始等待时间(秒)
backoff: 每次重试后等待时间的倍数
"""
def decorator(func: Callable) -> Callable:
@wraps(func)
async def wrapper(*args, **kwargs) -> Any:
current_delay = delay
last_exception = None
for attempt in range(max_retries + 1):
try:
return await func(*args, **kwargs)
except Exception as e:
last_exception = e
if attempt < max_retries:
logger.warning(
f"{func.__name__} 第{attempt + 1}次失败: {e},"
f"{current_delay:.1f}秒后重试"
)
await asyncio.sleep(current_delay)
current_delay *= backoff
else:
logger.error(
f"{func.__name__} 达到最大重试次数({max_retries}),"
f"最后错误: {e}"
)
raise last_exception
return wrapper
return decorator
class RobustModbusClient:
"""
带自动重连的Modbus客户端封装
适合长期运行的生产监控程序
"""
def __init__(self, host: str, port: int = 502):
self.host = host
self.port = port
self._client = None
self._connected = False
async def ensure_connected(self) -> bool:
"""确保连接有效,必要时重新连接"""
if self._connected and self._client:
return True
try:
from pymodbus.client import AsyncModbusTcpClient
self._client = AsyncModbusTcpClient(
self.host, port=self.port, timeout=3
)
await self._client.connect()
self._connected = True
logger.info(f"已连接到 {self.host}:{self.port}")
return True
except Exception as e:
self._connected = False
logger.error(f"连接失败 {self.host}: {e}")
return False
@with_retry(max_retries=3, delay=1.0, backoff=2.0)
async def read_registers(self, address: int,
count: int,
device_id: int = 1) -> list:
"""读取寄存器,失败自动重试"""
if not await self.ensure_connected():
raise ConnectionError(f"无法连接到设备 {self.host}")
try:
response = await self._client.read_holding_registers(
address=address, count=count, device_id=device_id
)
if response.isError():
self._connected = False # 标记需要重连
raise Exception(f"Modbus错误响应: {response}")
return response.registers
except Exception:
self._connected = False # 任何异常都触发重连
raise
@with_retry(max_retries=3, delay=1.0, backoff=2.0)
async def write_register(self, address: int,
value: int,
device_id: int = 1) -> bool:
"""写入单个寄存器,失败自动重试"""
if not await self.ensure_connected():
raise ConnectionError(f"无法连接到设备 {self.host}")
try:
response = await self._client.write_register(
address=address, value=value, device_id=device_id
)
if response.isError():
self._connected = False
raise Exception(f"Modbus写入错误: {response}")
return True
except Exception:
self._connected = False
raise
async def close(self):
if self._client:
self._client.close()
self._connected = False
logger.info("Modbus连接已关闭")
# 使用示例
async def main():
# 创建客户端实例
client = RobustModbusClient("127.0.0.1", 502)
try:
# 读取保持寄存器
print("读取寄存器 40001-40005...")
registers = await client.read_registers(
address=0, # Modbus地址从0开始
count=5, # 读取5个寄存器
device_id=1 # 从站ID
)
print(f"读取结果: {registers}")
# 写入寄存器
print("\n写入寄存器 40001...")
success = await client.write_register(
address=0,
value=1234,
device_id=1
)
print(f"写入{'成功' if success else '失败'}")
# 验证写入结果
print("\n验证写入结果...")
registers = await client.read_registers(0, 1, 1)
print(f"验证结果: {registers[0]}")
except Exception as e:
logger.error(f"操作失败: {e}")
finally:
await client.close()
# 连续监控示例
async def continuous_monitor():
client = RobustModbusClient("127.0.0.1")
try:
while True:
try:
# 每5秒读取一次数据
data = await client.read_registers(0, 10, 1)
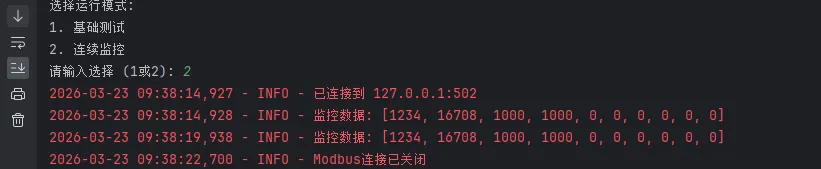
logger.info(f"监控数据: {data}")
# 检查某个报警条件
if len(data) > 5 and data[5] > 1000:
logger.warning(f"报警: 寄存器5值异常 {data[5]}")
await asyncio.sleep(5)
except Exception as e:
logger.error(f"监控异常: {e}")
await asyncio.sleep(10) # 异常时等待更长时间
except KeyboardInterrupt:
logger.info("监控程序被用户中断")
finally:
await client.close()
if __name__ == "__main__":
print("选择运行模式:")
print("1. 基础测试")
print("2. 连续监控")
choice = input("请输入选择 (1或2): ").strip()
if choice == "1":
asyncio.run(main())
elif choice == "2":
asyncio.run(continuous_monitor())
else:
print("无效选择")
📊 实战总结
工业协议对接这件事,难不在代码本身,难在理解设备。同样是Modbus TCP,西门子PLC和台达变频器的寄存器映射完全不同,字节序可能不同,有些设备甚至对功能码有私有扩展。
几个经验之谈:
第一,拿到手册先看通信章节,把寄存器地址表复制出来,做成配置文件,别硬编码在代码里。设备换型号的时候你会感谢自己的。
第二,先用工具验证,再写代码。Modbus Poll、UaExpert这些工具能帮你确认设备是否正常响应,排除硬件和配置问题,让你专注在Python代码上。
第三,日志要详细。工厂环境出问题往往是凌晨三点,你不在现场。详细的日志是你远程排查问题的唯一武器。
工业设备通信这个领域,Python的生态已经相当成熟。pymodbus、asyncua、pycomm3(EtherNet/IP)这些库都在积极维护。把这些工具用好,你完全可以用Python构建一套稳定运行在生产环境的数据采集系统。
相关技术标签:#Python工控开发 #Modbus协议 #OPC-UA #工业物联网 #异步编程
相关信息
我用夸克网盘给你分享了「opcmodbusDemo.zip」,点击链接或复制整段内容,打开「夸克APP」即可获取。
/63b43YUjQM:/
链接:https://pan.quark.cn/s/5f8ab9c14411
提取码:BYPH
本文作者:技术老小子
本文链接:
版权声明:本博客所有文章除特别声明外,均采用 BY-NC-SA 许可协议。转载请注明出处!