
目录
你是否曾经为了部署一个AI模型而头疼不已?训练好的模型在不同平台间迁移困难,性能优化复杂,部署成本居高不下......作为C#开发者,我们迫切需要一个高效、跨平台的AI推理解决方案。
今天,我将带你用最简单的方式搭建第一个ONNX Runtime程序,让你在5分钟内体验到AI模型部署的魅力。本文将解决初学者最关心的三个问题:如何快速上手、常见坑点避免、实际项目应用。
🔍 为什么选择ONNX Runtime?
核心痛点分析
在传统的AI模型部署中,开发者通常面临以下挑战:
- 平台兼容性差:不同框架训练的模型难以跨平台使用
- 性能优化复杂:CPU和GPU优化需要大量专业知识
- 部署成本高:需要安装庞大的深度学习框架
ONNX Runtime完美解决了这些问题:它是微软开源的高性能机器学习推理引擎,支持多种硬件平台,专为生产环境优化。
🛠️ 环境准备
安装NuGet包
C#// 安装ONNX Runtime CPU版本
dotnet add package Microsoft.ML.OnnxRuntime --version 1.23.2
⚠️ 重要提醒:选择CPU版本还是GPU版本要根据实际需求,初学者建议先从CPU版本开始。
准备测试模型
下载一个简单的ONNX模型用于测试(建议使用mnist手写数字识别模型):
C#// 模型文件放在项目根目录下
// mnist-8.onnx (28x28像素的手写数字识别模型)
🔥 第一个ONNX Runtime程序
核心代码实现
C#using Microsoft.ML.OnnxRuntime;
using Microsoft.ML.OnnxRuntime.Tensors;
namespace AppOnnx
{
internal class Program
{
static void Main(string[] args)
{
try
{
// 步骤1:初始化推理会话
var sessionOptions = new SessionOptions();
using var session = new InferenceSession("mnist-8.onnx", sessionOptions);
// 检查模型的输入输出信息
PrintModelInfo(session);
// 步骤2:准备输入数据
var inputData = CreateSampleInput();
// 获取正确的输入节点名称
var inputName = session.InputMetadata.Keys.First();
var inputs = new List<NamedOnnxValue>
{
NamedOnnxValue.CreateFromTensor(inputName, inputData)
};
// 步骤3:执行推理
using var results = session.Run(inputs);
// 步骤4:处理输出结果
var output = results.FirstOrDefault()?.AsTensor<float>();
if (output != null)
{
var predictedDigit = GetPredictedDigit(output);
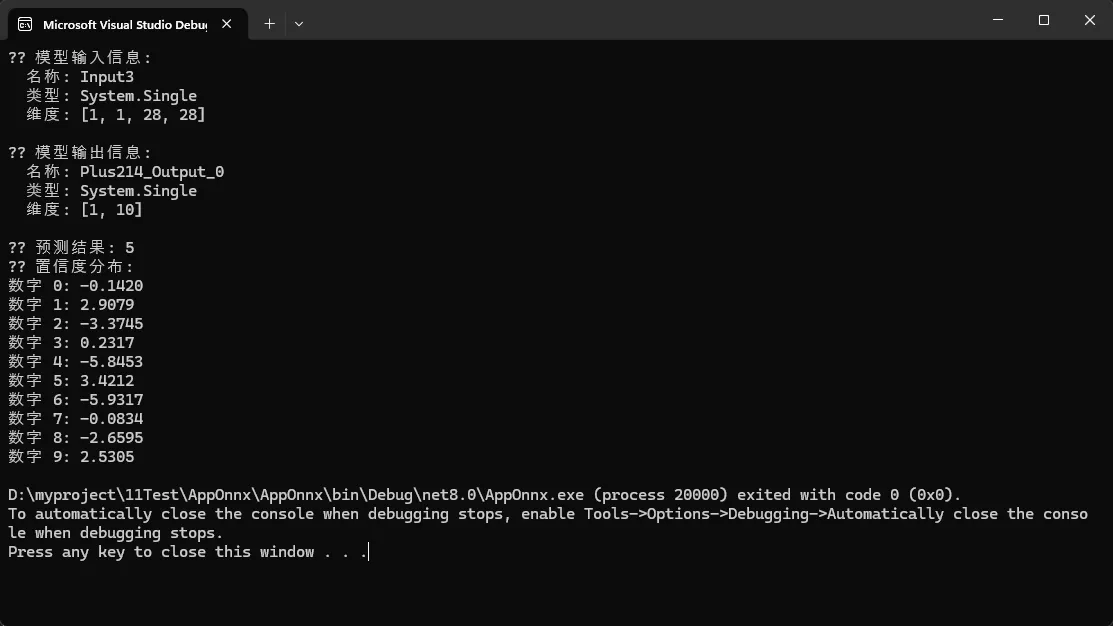
Console.WriteLine($"🎉 预测结果: {predictedDigit}");
Console.WriteLine($"📊 置信度分布:");
PrintConfidenceScores(output);
}
else
{
Console.WriteLine("❌ 无法获取输出结果");
}
}
catch (Exception ex)
{
Console.WriteLine($"❌ 执行出错: {ex.Message}");
Console.WriteLine($"📍 堆栈跟踪: {ex.StackTrace}");
}
}
// 打印模型信息
private static void PrintModelInfo(InferenceSession session)
{
Console.WriteLine("📋 模型输入信息:");
foreach (var input in session.InputMetadata)
{
Console.WriteLine($" 名称: {input.Key}");
Console.WriteLine($" 类型: {input.Value.ElementType}");
Console.WriteLine($" 维度: [{string.Join(", ", input.Value.Dimensions)}]");
}
Console.WriteLine("\n📋 模型输出信息:");
foreach (var output in session.OutputMetadata)
{
Console.WriteLine($" 名称: {output.Key}");
Console.WriteLine($" 类型: {output.Value.ElementType}");
Console.WriteLine($" 维度: [{string.Join(", ", output.Value.Dimensions)}]");
}
Console.WriteLine();
}
// 创建示例输入数据(模拟28x28的手写数字图像)
private static Tensor<float> CreateSampleInput()
{
// 标准MNIST输入格式:[batch_size, channels, height, width] 或 [batch_size, height, width, channels]
var tensor = new DenseTensor<float>(new[] { 1, 1, 28, 28 });
// 模拟一个简单的数字"1"
for (int i = 10; i < 18; i++)
{
for (int j = 12; j < 16; j++)
{
if (i < 28 && j < 28) // 添加边界检查
{
tensor[0, 0, i, j] = 1.0f;
}
}
}
return tensor;
}
// 获取预测结果
private static int GetPredictedDigit(Tensor<float> output)
{
if (output == null || output.Length == 0) return -1;
var maxIndex = 0;
var maxValue = float.MinValue;
// 安全的索引访问
var span = output.ToArray(); // 转换为数组进行安全访问
for (int i = 0; i < span.Length && i < 10; i++) // MNIST有10个类别(0-9)
{
if (span[i] > maxValue)
{
maxValue = span[i];
maxIndex = i;
}
}
return maxIndex;
}
// 打印置信度分数
private static void PrintConfidenceScores(Tensor<float> output)
{
if (output == null || output.Length == 0) return;
var span = output.ToArray();
var length = Math.Min(span.Length, 10); // 确保不超过10个类别
for (int i = 0; i < length; i++)
{
Console.WriteLine($"数字 {i}: {span[i]:F4}");
}
}
}
}
实际数字识别例子
C#using Microsoft.ML.OnnxRuntime;
using Microsoft.ML.OnnxRuntime.Tensors;
using OpenCvSharp;
namespace AppOnnx
{
internal class Program
{
static void Main(string[] args)
{
Console.OutputEncoding = System.Text.Encoding.UTF8;
try
{
// 步骤1:初始化推理会话
var sessionOptions = new SessionOptions();
using var session = new InferenceSession("mnist-8.onnx", sessionOptions);
// 检查模型的输入输出信息
PrintModelInfo(session);
// 步骤2:从图片文件加载和预处理输入数据
var inputData = LoadAndPreprocessImage("hand.jpg");
if (inputData == null)
{
Console.WriteLine("❌ 无法加载图片文件 hand.jpg");
return;
}
// 获取正确的输入节点名称
var inputName = session.InputMetadata.Keys.First();
var inputs = new List<NamedOnnxValue>
{
NamedOnnxValue.CreateFromTensor(inputName, inputData)
};
// 步骤3:执行推理
using var results = session.Run(inputs);
// 步骤4:处理输出结果
var output = results.FirstOrDefault()?.AsTensor<float>();
if (output != null)
{
var predictedDigit = GetPredictedDigit(output);
Console.WriteLine($"🎉 预测结果: {predictedDigit}");
Console.WriteLine($"📊 置信度分布:");
PrintConfidenceScores(output);
}
else
{
Console.WriteLine("❌ 无法获取输出结果");
}
}
catch (Exception ex)
{
Console.WriteLine($"❌ 执行出错: {ex.Message}");
Console.WriteLine($"📍 堆栈跟踪: {ex.StackTrace}");
}
}
// 打印模型信息
private static void PrintModelInfo(InferenceSession session)
{
Console.WriteLine("📋 模型输入信息:");
foreach (var input in session.InputMetadata)
{
Console.WriteLine($" 名称: {input.Key}");
Console.WriteLine($" 类型: {input.Value.ElementType}");
Console.WriteLine($" 维度: [{string.Join(", ", input.Value.Dimensions)}]");
}
Console.WriteLine("\n📋 模型输出信息:");
foreach (var output in session.OutputMetadata)
{
Console.WriteLine($" 名称: {output.Key}");
Console.WriteLine($" 类型: {output.Value.ElementType}");
Console.WriteLine($" 维度: [{string.Join(", ", output.Value.Dimensions)}]");
}
Console.WriteLine();
}
// 🔥 使用OpenCvSharp加载和预处理图片
private static Tensor<float>? LoadAndPreprocessImage(string imagePath)
{
try
{
if (!File.Exists(imagePath))
{
Console.WriteLine($"❌ 图片文件不存在: {imagePath}");
return null;
}
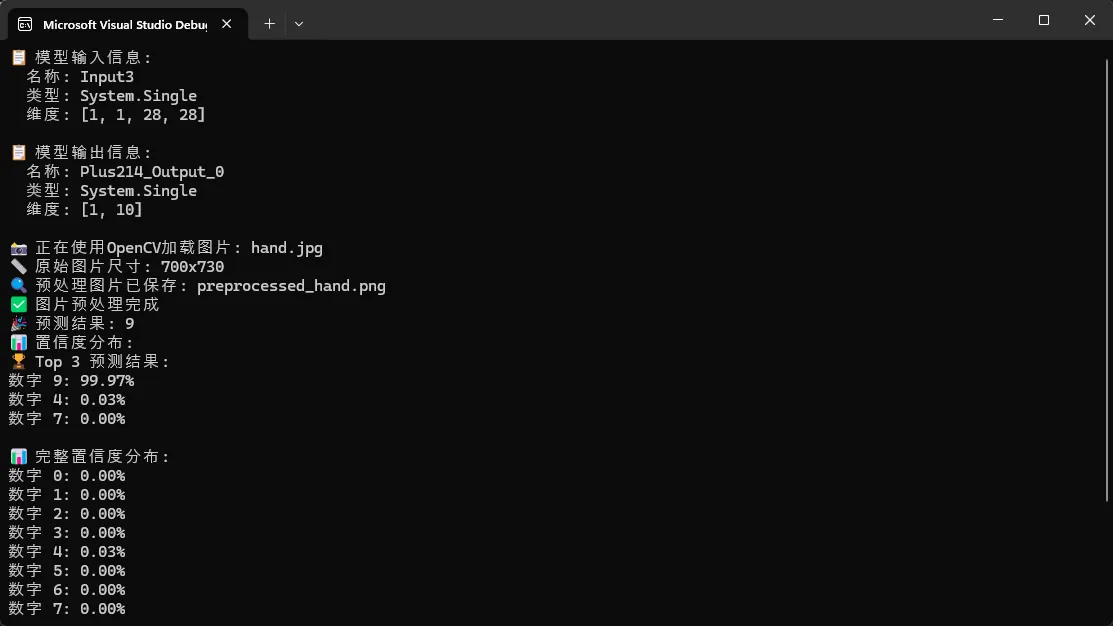
Console.WriteLine($"📸 正在使用OpenCV加载图片: {imagePath}");
// 1. 加载图片(自动转换为灰度图)
using var originalImage = Cv2.ImRead(imagePath, ImreadModes.Grayscale);
if (originalImage.Empty())
{
Console.WriteLine("❌ 无法读取图片文件");
return null;
}
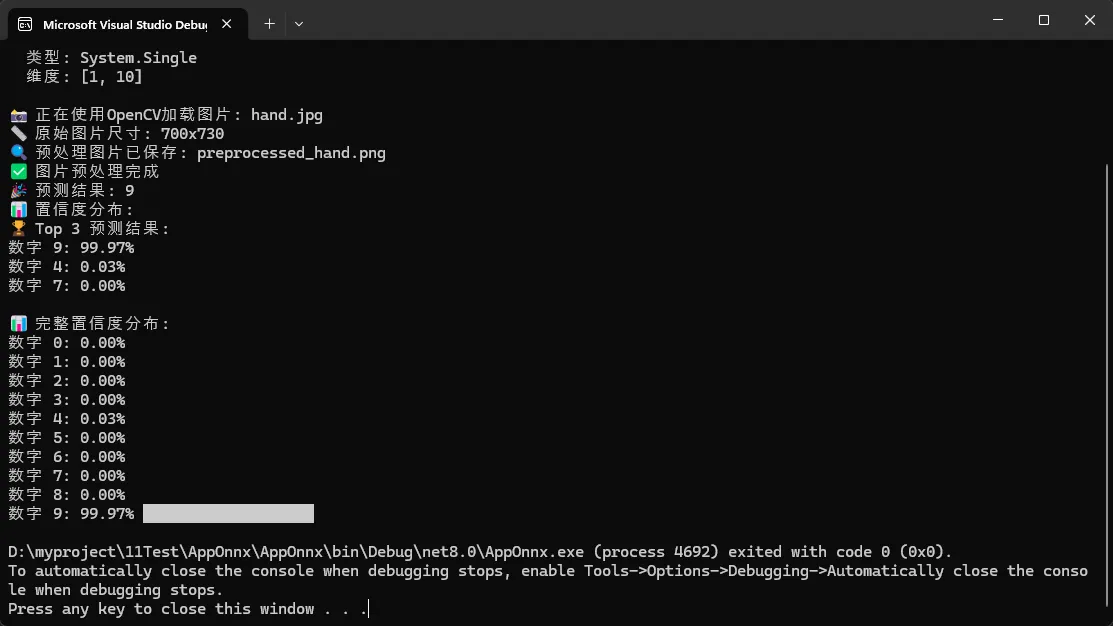
Console.WriteLine($"📏 原始图片尺寸: {originalImage.Width}x{originalImage.Height}");
// 2. 调整大小到28x28
using var resizedImage = new Mat();
Cv2.Resize(originalImage, resizedImage, new Size(28, 28), interpolation: InterpolationFlags.Area);
// 3. 应用高斯模糊以减少噪声
using var blurredImage = new Mat();
Cv2.GaussianBlur(resizedImage, blurredImage, new Size(3, 3), 0);
// 4. 应用阈值处理以增强对比度
using var thresholdImage = new Mat();
Cv2.Threshold(blurredImage, thresholdImage, 128, 255, ThresholdTypes.Binary);
// 5. 可选:保存预处理后的图片用于调试
SavePreprocessedImage(thresholdImage, "preprocessed_hand.png");
// 6. 转换为张量
var tensor = ConvertMatToTensor(thresholdImage);
Console.WriteLine("✅ 图片预处理完成");
return tensor;
}
catch (Exception ex)
{
Console.WriteLine($"❌ 图片处理失败: {ex.Message}");
return null;
}
}
// 将OpenCV Mat转换为ONNX张量
private static Tensor<float> ConvertMatToTensor(Mat image)
{
var tensor = new DenseTensor<float>(new[] { 1, 1, 28, 28 });
// 获取图像数据
var imageData = new byte[28 * 28];
image.GetArray(out imageData);
for (int y = 0; y < 28; y++)
{
for (int x = 0; x < 28; x++)
{
var pixelValue = imageData[y * 28 + x];
// 归一化到0-1范围
// 对于MNIST,白色背景(255)应该是0,黑色数字(0)应该是1
float normalizedValue = (255.0f - pixelValue) / 255.0f;
tensor[0, 0, y, x] = normalizedValue;
}
}
return tensor;
}
// 保存预处理后的图片用于调试
private static void SavePreprocessedImage(Mat image, string filename)
{
try
{
Cv2.ImWrite(filename, image);
Console.WriteLine($"🔍 预处理图片已保存: {filename}");
}
catch (Exception ex)
{
Console.WriteLine($"⚠️ 保存预处理图片失败: {ex.Message}");
}
}
// 高级图像预处理版本(可选使用)
private static Tensor<float>? LoadAndPreprocessImageAdvanced(string imagePath)
{
try
{
Console.WriteLine($"📸 正在进行高级图像预处理: {imagePath}");
using var originalImage = Cv2.ImRead(imagePath, ImreadModes.Grayscale);
if (originalImage.Empty())
{
Console.WriteLine("❌ 无法读取图片文件");
return null;
}
// 1. 自适应阈值处理
using var adaptiveThresh = new Mat();
Cv2.AdaptiveThreshold(originalImage, adaptiveThresh, 255,
AdaptiveThresholdTypes.GaussianC, ThresholdTypes.Binary, 11, 2);
// 2. 形态学操作去除噪声
using var kernel = Cv2.GetStructuringElement(MorphShapes.Rect, new Size(2, 2));
using var morphImage = new Mat();
Cv2.MorphologyEx(adaptiveThresh, morphImage, MorphTypes.Close, kernel);
// 3. 寻找轮廓并提取数字区域
Cv2.FindContours(morphImage, out var contours, out var hierarchy,
RetrievalModes.External, ContourApproximationModes.ApproxSimple);
if (contours.Length > 0)
{
// 找到最大的轮廓(假设是数字)
var largestContour = contours.OrderByDescending(c => Cv2.ContourArea(c)).First();
var boundingRect = Cv2.BoundingRect(largestContour);
// 扩展边界框
var margin = 10;
var expandedRect = new Rect(
Math.Max(0, boundingRect.X - margin),
Math.Max(0, boundingRect.Y - margin),
Math.Min(originalImage.Width - boundingRect.X + margin, boundingRect.Width + 2 * margin),
Math.Min(originalImage.Height - boundingRect.Y + margin, boundingRect.Height + 2 * margin)
);
// 提取数字区域
using var digitRegion = new Mat(morphImage, expandedRect);
// 4. 调整大小到28x28,保持宽高比
using var resizedImage = ResizeWithPadding(digitRegion, 28, 28);
SavePreprocessedImage(resizedImage, "advanced_preprocessed_hand.png");
return ConvertMatToTensor(resizedImage);
}
else
{
// 如果没找到轮廓,使用标准处理
using var resizedImage = new Mat();
Cv2.Resize(morphImage, resizedImage, new Size(28, 28));
return ConvertMatToTensor(resizedImage);
}
}
catch (Exception ex)
{
Console.WriteLine($"❌ 高级图像处理失败: {ex.Message}");
return null;
}
}
// 保持宽高比的缩放和填充
private static Mat ResizeWithPadding(Mat image, int targetWidth, int targetHeight)
{
var aspectRatio = (double)image.Width / image.Height;
var targetAspectRatio = (double)targetWidth / targetHeight;
int newWidth, newHeight;
if (aspectRatio > targetAspectRatio)
{
newWidth = targetWidth;
newHeight = (int)(targetWidth / aspectRatio);
}
else
{
newHeight = targetHeight;
newWidth = (int)(targetHeight * aspectRatio);
}
// 调整大小
using var resized = new Mat();
Cv2.Resize(image, resized, new Size(newWidth, newHeight));
// 创建目标尺寸的黑色图像
var result = Mat.Zeros(targetHeight, targetWidth, MatType.CV_8UC1);
// 计算居中位置
var x = (targetWidth - newWidth) / 2;
var y = (targetHeight - newHeight) / 2;
// 将调整后的图像复制到中心
var roi = new Rect(x, y, newWidth, newHeight);
resized.CopyTo(new Mat(result, roi));
return result;
}
// 获取预测结果
private static int GetPredictedDigit(Tensor<float> output)
{
if (output == null || output.Length == 0) return -1;
var maxIndex = 0;
var maxValue = float.MinValue;
var span = output.ToArray();
for (int i = 0; i < span.Length && i < 10; i++)
{
if (span[i] > maxValue)
{
maxValue = span[i];
maxIndex = i;
}
}
return maxIndex;
}
// 打印置信度分数
private static void PrintConfidenceScores(Tensor<float> output)
{
if (output == null || output.Length == 0) return;
var span = output.ToArray();
var length = Math.Min(span.Length, 10);
// 应用Softmax来获得概率分布
var softmax = ApplySoftmax(span.Take(length).ToArray());
Console.WriteLine("🏆 Top 3 预测结果:");
var topResults = softmax
.Select((prob, index) => new { Digit = index, Probability = prob })
.OrderByDescending(x => x.Probability)
.Take(3);
foreach (var result in topResults)
{
Console.WriteLine($"数字 {result.Digit}: {result.Probability:P2}");
}
Console.WriteLine("\n📊 完整置信度分布:");
for (int i = 0; i < length; i++)
{
var bar = new string('█', (int)(softmax[i] * 20));
Console.WriteLine($"数字 {i}: {softmax[i]:P2} {bar}");
}
}
// 应用Softmax函数
private static float[] ApplySoftmax(float[] values)
{
var max = values.Max();
var exp = values.Select(x => Math.Exp(x - max)).ToArray();
var sum = exp.Sum();
return exp.Select(x => (float)(x / sum)).ToArray();
}
}
}
📈 实际应用场景
这个基础框架可以应用于多种场景:
- 图像识别应用:商品识别、医疗影像分析
- 文本处理系统:情感分析、文档分类
- 推荐系统:个性化内容推荐
💡 进阶优化技巧
🚀 性能优化方案
C#// 🔥 收藏级代码模板:高性能配置
private static SessionOptions CreateOptimizedSessionOptions()
{
    var options = new SessionOptions();

    // 启用CPU优化
    options.EnableCpuMemArena = true;
    options.EnableMemoryPattern = true;

    // 设置执行提供者
    options.AppendExecutionProvider_CPU(0);

    // 设置线程数(根据CPU核心数调整)
    options.IntraOpNumThreads = Environment.ProcessorCount;

    return options;
}
🛡️ 资源管理最佳实践
C#// 🔥 金句总结:正确的资源释放是ONNX Runtime应用的关键
public class OnnxModelWrapper : IDisposable
{
    private InferenceSession _session;
    private bool _disposed = false;

    public OnnxModelWrapper(string modelPath)
    {
        var options = CreateOptimizedSessionOptions();
        _session = new InferenceSession(modelPath, options);
    }

    public float[] Predict(float[] inputData)
    {
        if (_disposed)
            throw new ObjectDisposedException(nameof(OnnxModelWrapper));

        // 推理逻辑...
        return new float[0]; // 简化返回
    }

    public void Dispose()
    {
        if (!_disposed)
        {
            _session?.Dispose();
            _disposed = true;
        }
    }
}
⚠️ 常见坑点提醒
1. 模型输入格式问题
C#// ❌ 错误做法
var wrongInput = new float[784]; // 直接使用一维数组

// ✅ 正确做法
var correctInput = new DenseTensor<float>(new[] { 1, 1, 28, 28 });
2. 内存泄漏风险
C#// ⚠️ 记住:所有IDisposable对象都要正确释放
using var session = new InferenceSession(modelPath);
using var results = session.Run(inputs);
3. 线程安全考虑
C#// 🔥 实战经验:InferenceSession是线程安全的,可以并发调用Run方法
// 但建议为每个线程创建独立的会话实例以获得最佳性能
🎯 总结与延伸
通过这个简单的示例,我们掌握了ONNX Runtime的三个核心要点:
- 🎯 环境搭建:一个NuGet包搞定所有依赖
- ⚡ 核心流程:加载模型→准备输入→执行推理→处理输出
- 🛡️ 最佳实践:资源管理和性能优化并重
ONNX Runtime为C#开发者提供了一个强大而简洁的AI推理解决方案。无论你是想在Web应用中集成智能功能,还是构建桌面AI工具,这个基础框架都能为你节省大量开发时间。
下一步学习建议:尝试集成不同类型的ONNX模型,如目标检测、自然语言处理等,体验ONNX Runtime的真正威力。
💬 互动时间:
- 你在项目中遇到过哪些AI模型部署的挑战?
- 对于ONNX Runtime的GPU加速版本,你有什么使用经验想分享?
觉得有用请转发给更多同行 🚀 让更多C#开发者体验到AI开发的简单与高效!
关注我,获取更多C#开发实战技巧和AI编程干货!
相关信息
通过网盘分享的文件:AppOnnx.zip 链接: https://pan.baidu.com/s/1g4Qf4g8JL5X0voj358J8eA?pwd=nt2x 提取码: nt2x --来自百度网盘超级会员v9的分享
本文作者:技术老小子
本文链接:
版权声明:本博客所有文章除特别声明外,均采用 BY-NC-SA 许可协议。转载请注明出处!