你是否曾经为处理大量数据时程序运行缓慢而苦恼?当面对百万级数据计算时,传统的LINQ操作是否让你的应用变成"龟速"?今天我们要揭秘一个让C#性能飞跃的黑科技——SIMD编程,这个一定会是最优秀的吗,还真不一定?
SIMD(Single Instruction, Multiple Data)能让你的CPU一条指令同时处理多个数据,就像从单线作业升级到流水线生产。在实际测试中,SIMD优化的代码相比传统LINQ 有些场景能获得数倍的性能提升!
本文将通过完整的代码实战,教你掌握C# SIMD编程的核心技巧,让你的应用从此告别性能瓶颈。
🔍 问题分析:为什么传统LINQ这么慢?
性能瓶颈根源
传统LINQ在处理大数据集时存在三个致命问题:
- 串行处理:一次只能处理一个数据元素
- 频繁内存访问:每次操作都要单独访问内存
- 无法利用现代CPU优势:浪费了CPU的并行计算能力
C#// 传统方式:逐个处理,效率低下
var sum = data.Sum(); // 一次处理一个元素
var filtered = data.Where(x => x > 100).ToArray(); // 逐个判断
💡 SIMD的优势原理
现代CPU支持SIMD指令集(如SSE、AVX),能够:
- 并行计算:一次处理4-16个数据元素
- 向量化操作:利用专门的向量寄存器
- 硬件加速:直接使用CPU的优化指令
你是否还在为复杂的消息处理、事件驱动架构而头疼?传统的C#开发中,我们常常需要手动处理消息队列、事件总线,代码臃肿且难以维护。今天,我要为大家介绍一个革命性的框架——WolverineFx,它将彻底改变你对C#后端开发的认知!
WolverineFx是由.NET社区知名开发者Jeremy D. Miller创建的下一代应用框架,它不仅简化了消息处理,更是将高性能和简洁性完美结合。本文将通过实战案例,带你深入了解如何使用WolverineFx构建现代化的C#应用。
🔍 传统开发的三大痛点
痛点一:消息处理复杂度高
在传统的C#开发中,处理异步消息往往需要:
- 手动配置消息队列连接
- 编写大量的样板代码
- 复杂的错误处理和重试机制
痛点二:代码耦合度严重
- 业务逻辑与基础设施代码混杂
- 难以进行单元测试
- 扩展性差,维护成本高
痛点三:性能优化困难
- 传统框架性能开销大
- 内存管理不够精细
- 缺乏现代化的性能监控
💡 WolverineFx:现代C#开发的完美解决方案
WolverineFx采用了源代码生成技术和最小化API设计,提供了以下核心优势:
- 🚄 极致性能:基于源代码生成,运行时零反射
- 🎯 简洁API:最少的代码实现最强的功能
- 🔧 灵活配置:支持多种消息传输方式
- 📈 易于扩展:模块化设计,插件式架构
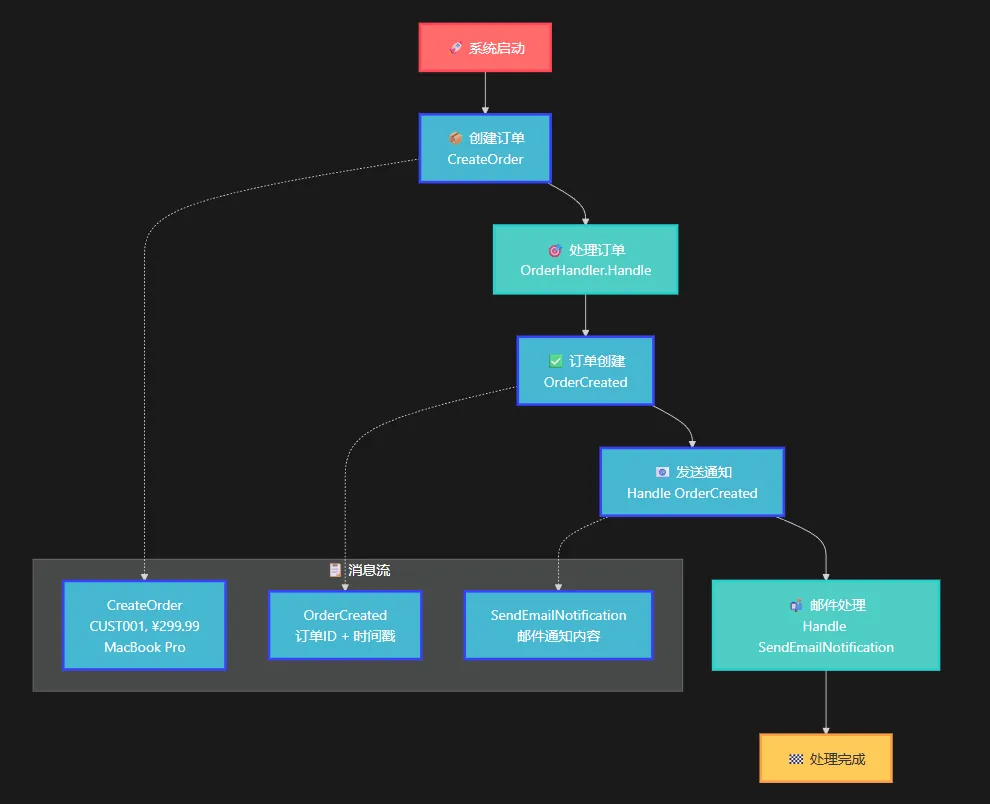
🛠️ 实战演练:构建一个高性能订单处理系统
让我们通过一个实际的订单处理系统来体验WolverineFx的强大功能。
流程
引言
在游戏和图形应用开发中,精灵(Sprite)旋转是一个常见且基础的动画效果。本文将详细分析一个使用SkiaSharp在Windows Forms中实现精灵旋转动画的示例程序。SkiaSharp是Skia图形库的.NET绑定,提供了高性能的2D图形渲染能力,是实现复杂图形效果的理想选择。
技术栈概述
本示例使用了以下技术:
- Windows Forms:提供应用程序的窗体基础
- SkiaSharp:高性能2D图形渲染库
- SkiaSharp.Views.Desktop:将SkiaSharp集成到Windows Forms的控件
- C#:实现应用程序逻辑的编程语言
程序结构分析
窗体初始化
程序首先创建一个标题为"精灵旋转演示"的窗体,设置大小为800x600像素,背景为白色:
C#public Form5()
{
    InitializeComponent();
    this.Text = "精灵旋转演示";
    this.Size = new Size(800, 600);
    this.BackColor = Color.White;

    // 后续初始化代码...
}
你是否在开发过程中遇到过这样的痛点:操作繁多、业务逻辑耦合严重、撤销功能难以实现?特别是在工业控制、游戏开发或复杂业务系统中,每一个操作都可能需要记录、撤销,甚至批量执行。
今天,我们通过一个完整的工业设备控制系统案例,深入解析**命令模式(Command Pattern)**的实际应用。这不仅仅是一个设计模式的讲解,更是一套可以直接应用到你项目中的完整解决方案!
🎯 问题分析:为什么需要命令模式?
在传统的设备控制系统中,我们经常会看到这样的代码:
C#// 传统做法 - 紧耦合的噩梦
private void StartMotor()
{
    motor.Start();
    logService.Log("启动电机");
    // 如果需要撤销怎么办?
    // 如果需要批量操作怎么办?
    // 如果需要延迟执行怎么办?
}
核心痛点:
- 📌 操作与对象紧耦合:直接调用对象方法,难以扩展
- 📌 无法撤销操作:执行后无法回滚到之前状态
- 📌 难以记录历史:无法追踪操作序列
- 📌 扩展性差:新增操作类型需要修改大量代码
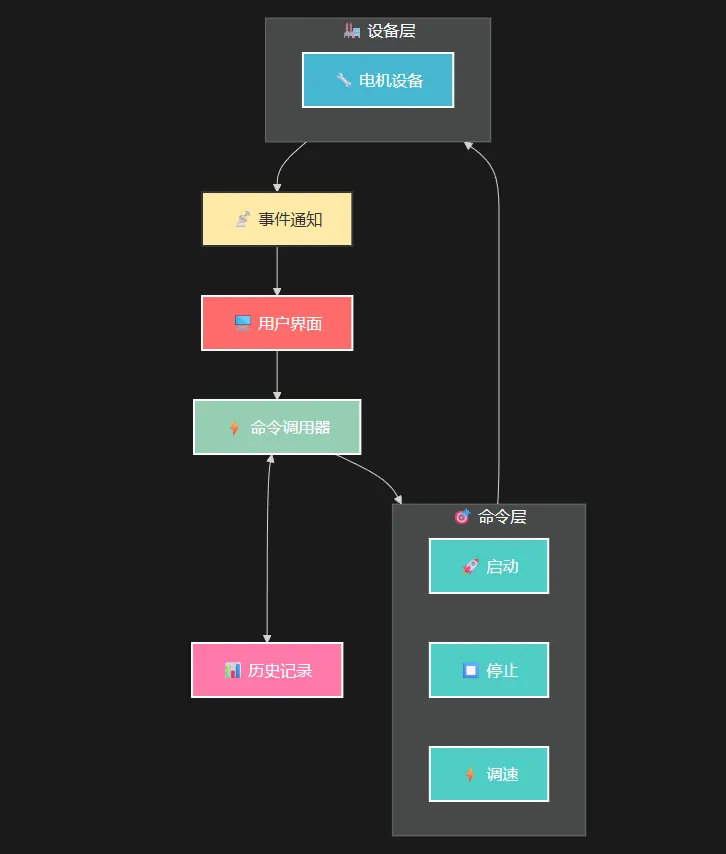
🎯 命令执行流程图
🎯 你的程序还在被数值解析拖慢吗?
在C#开发中,数值解析是一个看似简单却暗藏性能陷阱的操作。当我们处理大量CSV文件、日志解析或数据导入时,Double.Parse() 和 float.Parse() 往往成为性能瓶颈。你是否遇到过这样的场景:
- 🐌 大文件解析慢如蜗牛:处理几十万条数据记录时,程序卡顿明显
- 📊 CSV导入耗时过长:业务数据导入让用户望眼欲穿
- ⏰ 实时数据处理滞后:高频交易或物联网数据处理跟不上节拍
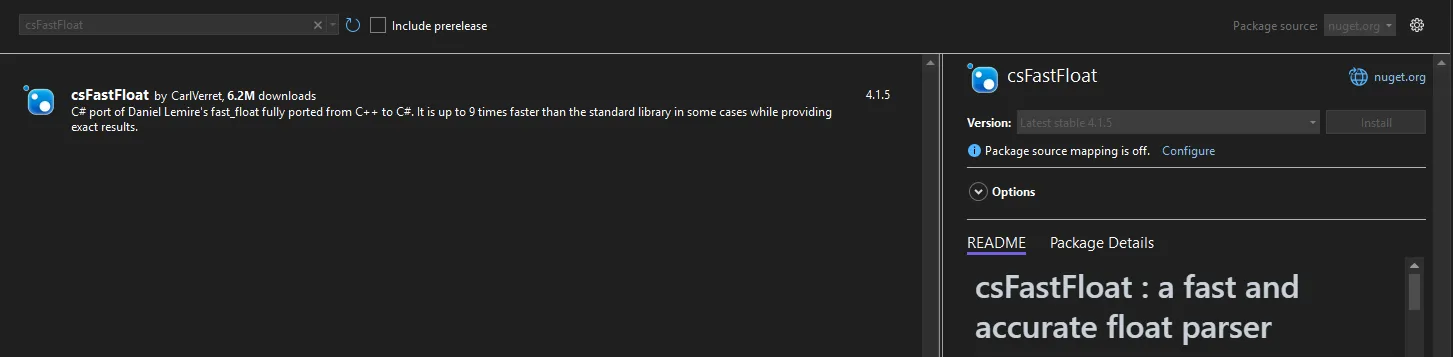
今天,我将为你揭秘一个能让C#数值解析性能提升3-9倍的神器——csFastFloat,让你的程序真正"快如闪电"!
🔥 性能对比:震撼的数据说话
在深入解决方案之前,让我们先看看csFastFloat到底有多快:
📈 基准测试数据
Markdown测试环境:.NET 9.0,Intel Xeon Gold 6338 CPU
测试数据:150,000个随机浮点数

| 方法                    | 处理时间    | 性能提升 | 处理速度(MB/s) |
|------------------------|------------|----------|----------------|
| Double.Parse()         | 14,575 μs  | 基准     | 194.07        |
| FastFloat.TryParse()   | 3,141 μs   | 4.6倍    | 899.86        |
结果惊人:在处理大量数值数据时,csFastFloat的性能提升高达4.6倍!
💡 问题深度分析:为什么标准解析这么慢?
🎯 性能瓶颈根源
- 字符串遍历开销:标准Parse方法需要多次遍历字符串
- 异常处理机制:内置的异常检查增加了额外开销
- 通用性设计:为了兼容各种格式,牺牲了性能优化空间
- 内存分配:频繁的临时对象创建导致GC压力
🚀 csFastFloat的优化策略
- SIMD指令集优化:利用SSE4.1等现代CPU指令
- 算法优化:采用Daniel Lemire教授的高效算法
- 零异常设计:通过TryParse模式避免异常开销
- 内存友好:最小化内存分配和GC压力
🎯 集成指南:让你的项目立即加速
📦 快速集成步骤
NuGet包安装
BashInstall-Package csFastFloat