
目录
在数据科学和机器学习项目中,你是否经常需要生成测试数据、进行蒙特卡洛模拟,或者为算法提供随机初始值?作为Python开发者,掌握NumPy的随机数生成功能是必不可少的技能。本文将从实战角度出发,详细介绍NumPy随机数生成的各种应用场景,帮你解决日常开发中遇到的随机数据生成难题。无论你是在做数据分析、机器学习模型训练,还是上位机开发中的数据模拟,这篇文章都将为你提供完整的解决方案。
🔍 随机数生成的核心问题分析
传统random模块的局限性
在Python开发中,很多初学者习惯使用内置的random模块,但在处理大规模数据时会遇到以下问题:
性能瓶颈:Python原生random模块基于单个数值生成,处理大量数据时效率低下
功能限制:缺乏对多维数组的直接支持,无法快速生成复杂的数据结构
科学计算不足:缺少常用的概率分布函数,难以满足统计分析需求
NumPy随机数生成的优势
NumPy的numpy.random模块专为数值计算和科学计算设计,具有以下核心优势:
- 向量化操作:一次生成大量随机数,性能提升显著
- 丰富的分布函数:支持30+种概率分布
- 多维数组支持:直接生成任意维度的随机数组
- 可重现性:通过随机种子确保结果可复现
💡 NumPy随机数生成完整解决方案
🌟 基础随机数生成
1. 均匀分布随机数
Pythonimport numpy as np
# 设置随机种子,确保结果可重现
np.random.seed(42)
# 生成0-1之间的随机数
random_float = np.random.random()
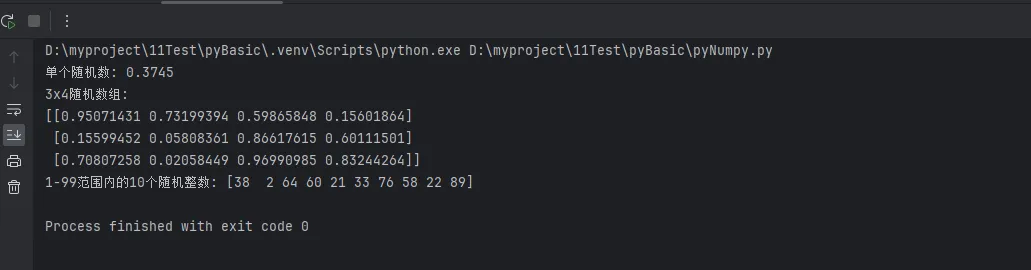
print(f"单个随机数: {random_float:.4f}")
# 生成指定形状的随机数组
random_array = np.random.random((3, 4))
print(f"3x4随机数组:\n{random_array}")
# 生成指定范围的随机整数
random_ints = np.random.randint(1, 100, size=10)
print(f"1-99范围内的10个随机整数: {random_ints}")
2. 指定范围的随机数
Python# uniform函数:生成指定范围的均匀分布
uniform_data = np.random.uniform(low=-10, high=10, size=(2, 5))
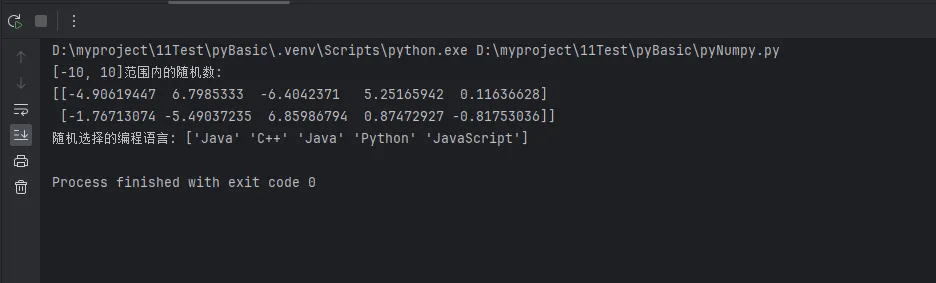
print(f"[-10, 10]范围内的随机数:\n{uniform_data}")
# choice函数:从数组中随机选择
choices = np.random.choice(['Python', 'Java', 'C++', 'JavaScript'],
size=5, replace=True)
print(f"随机选择的编程语言: {choices}")
🎲 常用概率分布生成
1. 正态分布(高斯分布)
Python# 标准正态分布 (均值=0, 标准差=1)
standard_normal = np.random.standard_normal(1000)
# 指定参数的正态分布
normal_data = np.random.normal(loc=50, scale=15, size=1000)
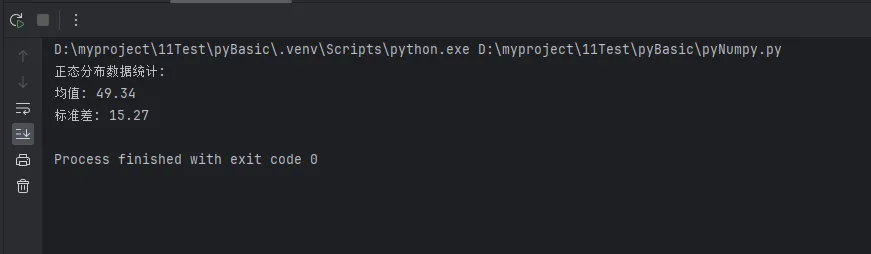
print(f"正态分布数据统计:")
print(f"均值: {np.mean(normal_data):.2f}")
print(f"标准差: {np.std(normal_data):.2f}")
# 多维正态分布
multivariate_normal = np.random.multivariate_normal(
mean=[0, 0],
cov=[[1, 0.5], [0.5, 1]],
size=500
)
2. 其他重要分布
Python# 指数分布 - 常用于模拟等待时间
exponential_data = np.random.exponential(scale=2.0, size=1000)

# 泊松分布 - 常用于计数数据
poisson_data = np.random.poisson(lam=3.0, size=1000)

# 二项分布 - 常用于成功/失败试验
binomial_data = np.random.binomial(n=10, p=0.3, size=1000)

# 伽马分布 - 常用于连续正值数据
gamma_data = np.random.gamma(shape=2.0, scale=1.0, size=1000)

print("各种分布数据生成完成!")
🔥 实战应用场景
1. 机器学习数据生成
Pythondef generate_ml_dataset(n_samples=1000, n_features=10, noise_level=0.1):
    """
    生成机器学习训练数据
    """
    # 生成特征数据
    X = np.random.randn(n_samples, n_features)

    # 生成权重
    true_weights = np.random.uniform(-2, 2, n_features)

    # 生成目标变量(带噪声)
    y = X.dot(true_weights) + np.random.normal(0, noise_level, n_samples)

    return X, y, true_weights

# 生成示例数据集
X_train, y_train, weights = generate_ml_dataset(1000, 5)
print(f"训练数据形状: X={X_train.shape}, y={y_train.shape}")
print(f"真实权重: {weights}")

2. 蒙特卡洛模拟
Pythondef monte_carlo_pi_estimation(n_samples=1000000):
"""
使用蒙特卡洛方法估算π值
"""
# 生成随机点坐标
x = np.random.uniform(-1, 1, n_samples)
y = np.random.uniform(-1, 1, n_samples)
# 计算在单位圆内的点数
inside_circle = (x**2 + y**2) <= 1
pi_estimate = 4 * np.sum(inside_circle) / n_samples
return pi_estimate
# 执行蒙特卡洛模拟
estimated_pi = monte_carlo_pi_estimation(1000000)
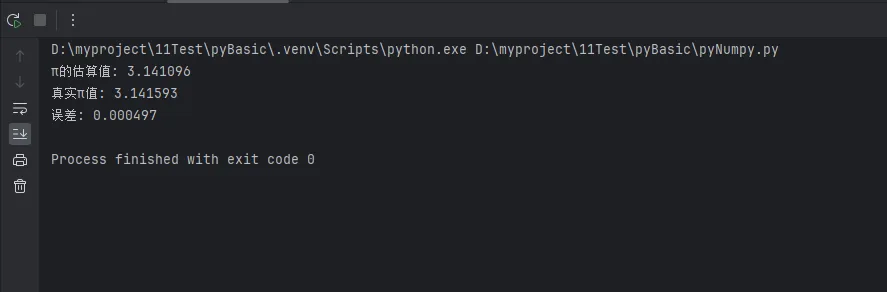
print(f"π的估算值: {estimated_pi:.6f}")
print(f"真实π值: {np.pi:.6f}")
print(f"误差: {abs(estimated_pi - np.pi):.6f}")
3. 数据增强和噪声添加
Pythondef add_noise_to_signal(signal, noise_type='gaussian', noise_level=0.1):
    """
    为信号添加不同类型的噪声
    """
    if noise_type == 'gaussian':
        noise = np.random.normal(0, noise_level, signal.shape)
    elif noise_type == 'uniform':
        noise = np.random.uniform(-noise_level, noise_level, signal.shape)
    elif noise_type == 'salt_pepper':
        mask = np.random.random(signal.shape) < noise_level
        noise = np.where(mask,
                        np.random.choice([-1, 1], signal.shape),
                        0)

    return signal + noise

# 生成原始信号
t = np.linspace(0, 2*np.pi, 1000)
clean_signal = np.sin(t)

# 添加不同类型的噪声
gaussian_noisy = add_noise_to_signal(clean_signal, 'gaussian', 0.1)
uniform_noisy = add_noise_to_signal(clean_signal, 'uniform', 0.1)

print("信号噪声添加完成!")
⚡ 性能优化技巧
1. 现代随机数生成器
Pythonimport numpy as np
import time
# 比较新旧API的性能差异
from numpy.random import default_rng
def compare_random_generators():
# 新的推荐方式
rng = default_rng(seed=42)
# 旧的方式(仍然可用但不推荐)
np.random.seed(42)
size = 1000000
# 测试新API
start_time = time.time()
new_random = rng.random(size)
new_time = time.time() - start_time
# 测试旧API
start_time = time.time()
old_random = np.random.random(size)
old_time = time.time() - start_time
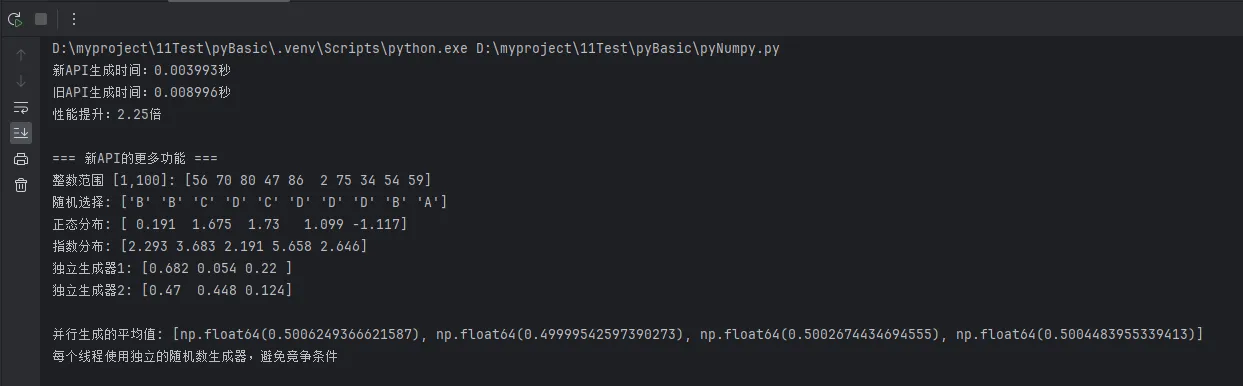
print(f"新API生成时间:{new_time:.6f}秒")
print(f"旧API生成时间:{old_time:.6f}秒")
print(f"性能提升:{old_time / new_time:.2f}倍")
# 展示更多新API功能
print("\n=== 新API的更多功能 ===")
# 1. 更好的整数生成(包含上界)
integers = rng.integers(1, 101, size=10) # 1到100包含100
print(f"整数范围 [1,100]: {integers}")
# 2. 选择和洗牌
choices = rng.choice(['A', 'B', 'C', 'D'], size=10, replace=True)
print(f"随机选择: {choices}")
# 3. 不同分布
normal = rng.normal(loc=0, scale=1, size=5)
exponential = rng.exponential(scale=2.0, size=5)
print(f"正态分布: {normal.round(3)}")
print(f"指数分布: {exponential.round(3)}")
# 4. 独立的随机数生成器(重要!)
rng1 = default_rng(seed=123)
rng2 = default_rng(seed=456)
print(f"独立生成器1: {rng1.random(3).round(3)}")
print(f"独立生成器2: {rng2.random(3).round(3)}")
# 展示线程安全和并行使用
def thread_safe_example():
"""新API支持更好的并行随机数生成"""
from concurrent.futures import ThreadPoolExecutor
def generate_random_batch(seed_offset):
# 每个线程使用独立的生成器
rng = default_rng(seed=42 + seed_offset)
return rng.random(100000).mean()
with ThreadPoolExecutor(max_workers=4) as executor:
futures = [executor.submit(generate_random_batch, i) for i in range(4)]
results = [f.result() for f in futures]
print(f"\n并行生成的平均值: {results}")
print("每个线程使用独立的随机数生成器,避免竞争条件")
if __name__ == "__main__":
compare_random_generators()
thread_safe_example()
2. 内存优化策略
Pythondef generate_large_dataset_efficiently(total_size, batch_size=10000):
"""
高效生成大型数据集,避免内存溢出
"""
results = []
for i in range(0, total_size, batch_size):
current_batch_size = min(batch_size, total_size - i)
batch_data = np.random.randn(current_batch_size, 100)
# 处理批次数据
processed_batch = np.mean(batch_data, axis=1)
results.append(processed_batch)
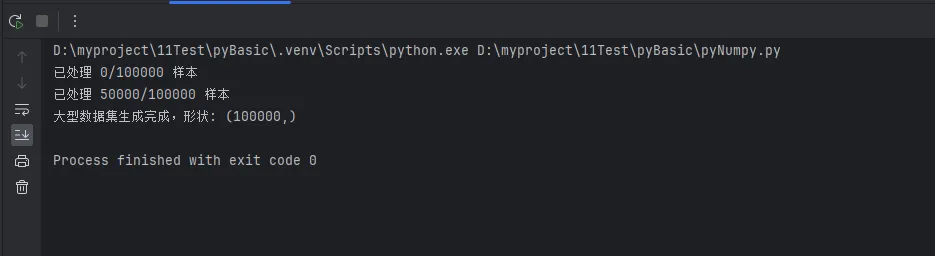
if i % 50000 == 0:
print(f"已处理 {i}/{total_size} 样本")
return np.concatenate(results)
# 生成大型数据集
large_dataset = generate_large_dataset_efficiently(100000)
print(f"大型数据集生成完成,形状: {large_dataset.shape}")
🛠️ 高级应用技巧
1. 随机采样策略
Pythondef stratified_sampling(data, labels, sample_ratio=0.2):
"""
分层抽样:保持各类别比例的随机采样
"""
unique_labels = np.unique(labels)
sampled_indices = []
for label in unique_labels:
label_indices = np.where(labels == label)[0]
n_samples = int(len(label_indices) * sample_ratio)
# 随机选择该类别的样本
selected = np.random.choice(label_indices, n_samples, replace=False)
sampled_indices.extend(selected)
sampled_indices = np.array(sampled_indices)
np.random.shuffle(sampled_indices) # 打乱顺序
return data[sampled_indices], labels[sampled_indices]
# 示例使用
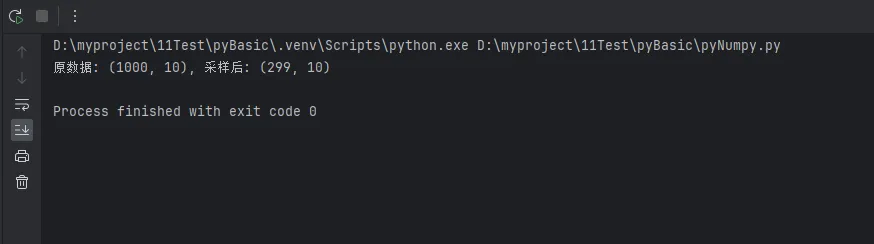
data = np.random.randn(1000, 10)
labels = np.random.choice([0, 1, 2], 1000)
sampled_data, sampled_labels = stratified_sampling(data, labels, 0.3)
print(f"原数据: {data.shape}, 采样后: {sampled_data.shape}")
2. 自定义分布生成
Pythondef generate_custom_distribution(size=1000):
"""
生成自定义混合分布
"""
# 30%来自N(0,1), 70%来自N(5,2)
mask = np.random.random(size) < 0.3
data = np.empty(size)
data[mask] = np.random.normal(0, 1, np.sum(mask))
data[~mask] = np.random.normal(5, 2, np.sum(~mask))
return data
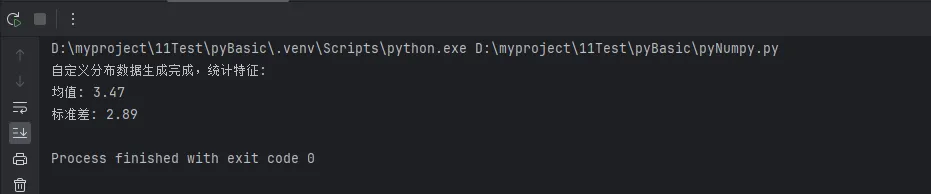
custom_data = generate_custom_distribution(10000)
print(f"自定义分布数据生成完成,统计特征:")
print(f"均值: {np.mean(custom_data):.2f}")
print(f"标准差: {np.std(custom_data):.2f}")
🚀 上位机开发中的应用
传感器数据模拟
Pythondef simulate_sensor_data(duration_hours=24, sample_rate=3600):
    """
    模拟传感器数据,适用于上位机开发测试
    """
    n_samples = duration_hours * sample_rate
    time_stamps = np.arange(n_samples) / sample_rate

    # 基础信号 + 周期性变化 + 随机噪声
    base_value = 25.0  # 基础温度
    daily_cycle = 5 * np.sin(2 * np.pi * time_stamps / 24)  # 日周期
    noise = np.random.normal(0, 0.5, n_samples)  # 传感器噪声

    # 偶尔的异常值
    anomaly_mask = np.random.random(n_samples) < 0.001
    anomalies = np.random.uniform(-10, 15, n_samples)

    sensor_data = base_value + daily_cycle + noise
    sensor_data[anomaly_mask] += anomalies[anomaly_mask]

    return time_stamps, sensor_data

# 生成24小时传感器数据
timestamps, temperature_data = simulate_sensor_data(24, 10)
print(f"传感器数据模拟完成,数据点数: {len(temperature_data)}")
print(f"温度范围: {np.min(temperature_data):.1f}°C - {np.max(temperature_data):.1f}°C")

🎯 总结:掌握NumPy随机数生成的三大要点
通过本文的详细介绍,相信你已经掌握了NumPy随机数生成的核心技能。让我们回顾一下三个关键要点:
第一,选择合适的生成方法:根据实际需求选择基础随机数、特定分布或自定义分布,合理使用numpy.random模块的丰富功能,为不同的Python开发场景提供精准的数据支持。
第二,注重性能和内存优化:在处理大规模数据时,使用现代随机数生成器API,采用批处理策略避免内存溢出,这在上位机开发和数据科学项目中尤为重要。
第三,确保代码的可重现性:通过设置随机种子和采用标准化的采样策略,让你的编程技巧更加专业,代码更加可靠。
掌握这些NumPy随机数生成技巧,将让你在数据分析、机器学习和科学计算项目中游刃有余。继续深入学习NumPy的其他高级功能,如数组操作、线性代数运算等,将进一步提升你的Python开发水平。记住,优秀的数据科学家和工程师,都从掌握这些基础而强大的工具开始!
本文作者:技术老小子
本文链接:
版权声明:本博客所有文章除特别声明外,均采用 BY-NC-SA 许可协议。转载请注明出处!